To integrate our ticket widget into your webpage, you have two options: Direct Link (easy) and Ticket Widget (advanced). Follow these steps to implement either option seamlessly:
- Log in to your event
- Go to the Promote/Marketing page (left menu)
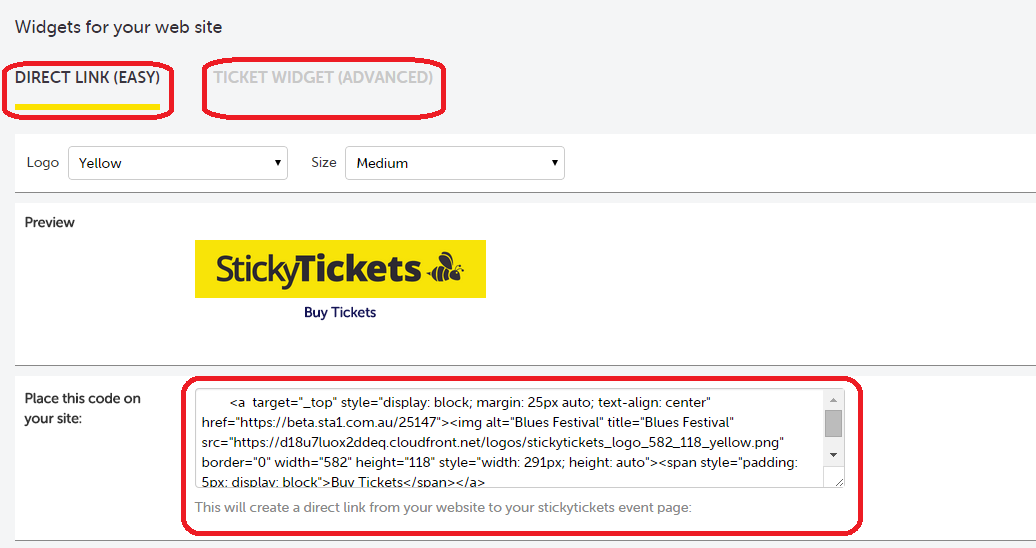
Option 1: Direct Link (easy)
- Log in to your event on Sticky Tickets.
- Navigate to the Promote/Marketing page from the left menu.
- Choose the color of the logo that best suits your webpage.
- Select the appropriate size for the button.
- Copy and paste the provided code onto your webpage where you want the 'Buy Now' button to appear.
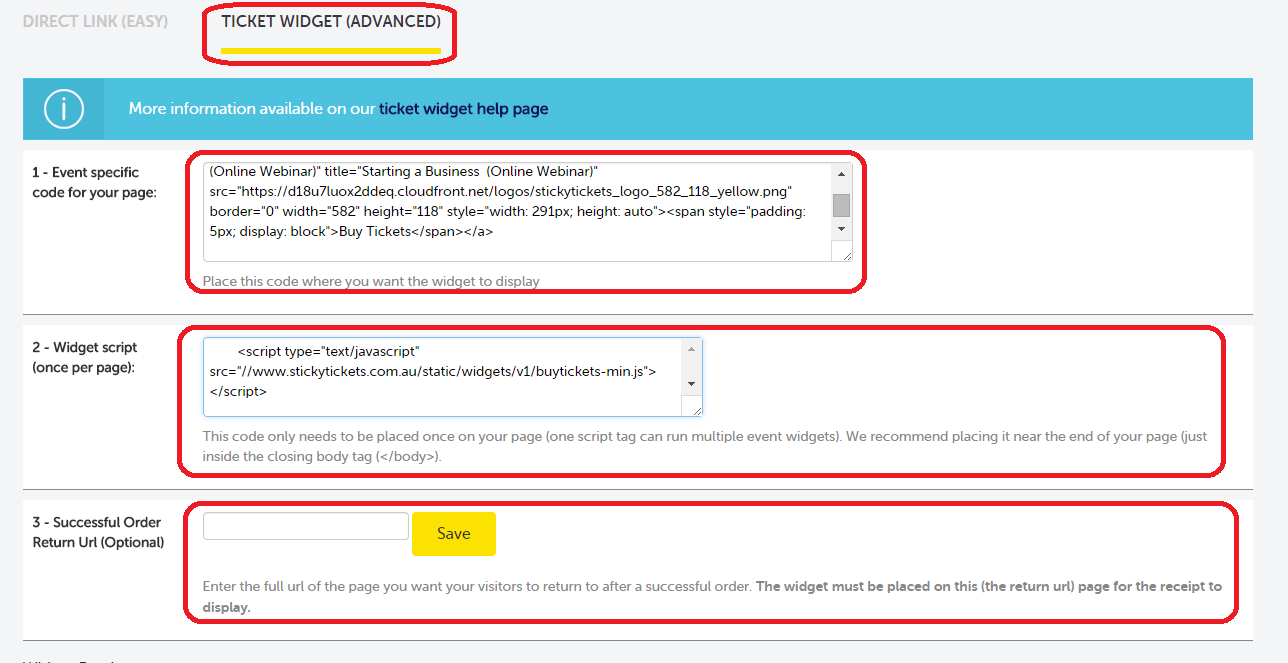
Option 2: Ticket Widget (advanced)
With this option, a ticket window will be embedded on your webpage, showcasing your event's sessions and available tickets. Your potential attendees can conveniently select the quantities of tickets they wish to purchase. Upon making their selection, they will be seamlessly redirected to our website to finalize their personal and payment details. This redirection is implemented for security reasons.
Once the purchase is completed, the ticket purchaser will be automatically redirected back to your website. Here, we display a 'Payment Successful' page, providing a summary of the purchase details. From this page, the ticket purchaser has the option to print the details or simply close the page. If they choose to close the page, they will then be directed to the specific page you designated when setting up the advanced ticket widget.
Note: To help enhance the ticket purchasing experience it is recommended that you match the look of your Sticky Tickets event page with the page that you are inserting the widget on, by using the Custom Page Design feature.
- Log in to your event on Sticky Tickets.
- Go to the Promote/Marketing page from the left menu.
- Choose the Ticket Widget (advanced) option.
- Customize the appearance to match your webpage using the Custom Page Design feature.
- Insert the first section of the code on your webpage where you want the widget to be displayed.
- Place the second section of the code (widget script) near the end of your webpage, just inside the closing body tag (</body>).
- Optionally, provide a Successful Order Return URL if you want the ticket purchaser to return to a specific page after completing the purchase.
To see an example of how the advanced widget will look, click here
For WordPress sites, please click here and scroll to the bottom of the page.
If you encounter any issues or need further assistance, please don't hesitate to contact us at any time.