The global Custom Page Design lets you set your branding once and have it apply automatically to every event you run. This is the right starting point if you want a consistent look across all your events — you can always override it for individual events later.
Global vs event-level design: The global design applies to all events by default. If you enable a custom design for a specific event, that event's design takes precedence over the global one. See: How to customise your event page design.
How to access the global Custom Page Design
- Log in to your Sticky Tickets organiser account.
- Go to Organiser Settings (or your organiser dashboard).
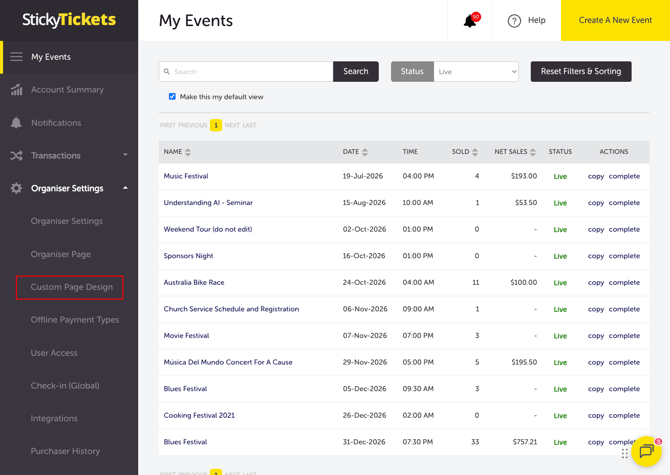
- Click Custom Page Design from the left sidebar or organiser menu.
- Toggle Custom Design to ON in the upper right of the page to activate your global design.
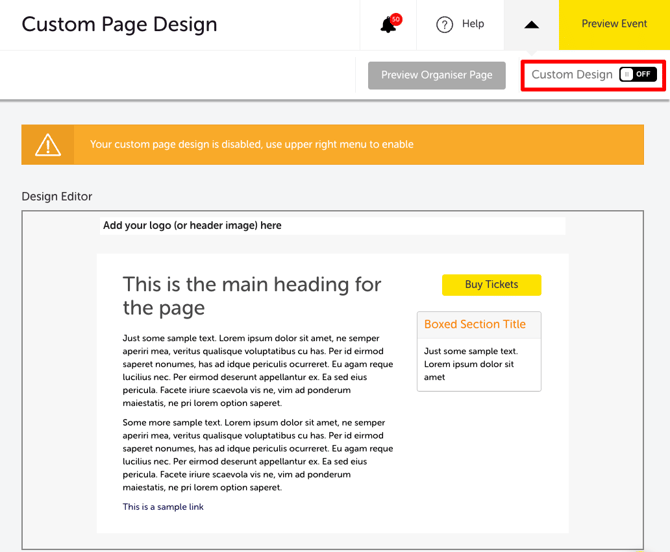
Once enabled, the Design Editor shows a live preview of your page layout with five editable zones.
How to edit each design area
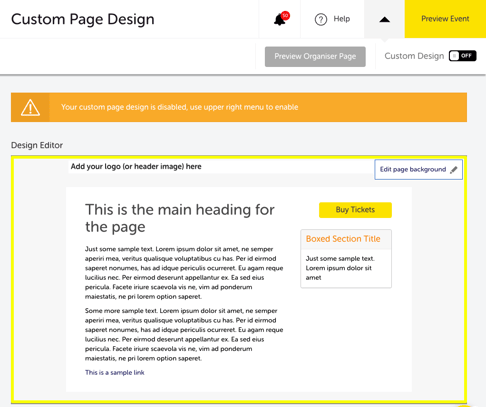
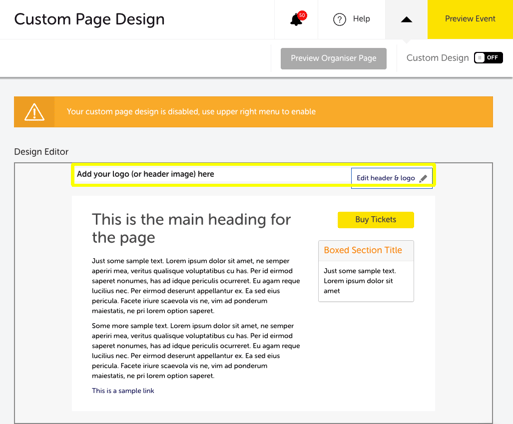
The Design Editor uses a hover-to-edit interaction. Move your cursor over a zone in the preview — it will highlight with a yellow border and an Edit button will appear. Click the Edit button to open that zone's settings.
There are five editable zones:
Page background
How to access: Hover over the outer area of the Design Editor preview. Click Edit page background.
| Setting | What it does |
| Background Image | Upload an image. Minimum size: 1600w × 2500h px for full browser width. Set repeat, position, and attachment. |
| Background Colour | Set a solid background colour. Images are placed on top. |
| Background Video | Upload a video or use a YouTube link. Recommended aspect ratio: 16:10. |
| Use Video | Tick to enable the video as the page background. |
| Mute / Autoplay / Loop | Control playback behaviour. |
Note: Autoplay may not work on some browsers. Muting the video often allows autoplay to work.
Header
How to access: Hover over the header area at the top of the preview. Click Edit header & logo.
| Setting | What it does |
| Logo Url | Upload your logo. Maximum size: 1200w × 200h px — larger images are resized automatically. Logo is placed in the top left corner. |
| Logo Alignment | Set position: Left, Centre, or Right |
| Logo Spacing | Add padding above, below, left, and right of the logo. |
| Video | Upload a header video or use a YouTube link. Recommended size: 1920 × 560px. |
| Use Video | Tick to display the video in the header. |
| Mute / Autoplay / Loop | Control header video playback. |
| Background | Toggle visibility and set the header background colour. Match this to your logo's background colour for a seamless look. |
| Full Width | Tick to make the header video span the full page width. |
Main Content
How to access: Hover over the main content area (the white content box). Click Edit main content.
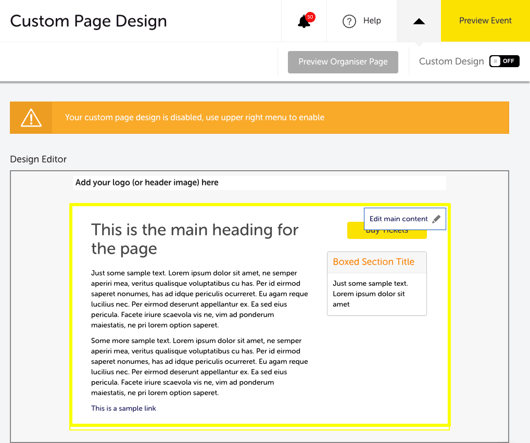
| Setting | What it does |
| Page Heading | Colour of the main page heading. Use a dark colour on a white background. |
| Border | Width, style, and colour of the border separating the content area from the background. Set width to 0 to remove. |
| Content Spacing | Top and bottom padding (px) between the content area and the page header/footer. |
| Background | Background colour of the content area. |
| Text | Body text colour. |
| Link | Hyperlink colour. |
Boxed Section
How to access: Hover over the Boxed Section panel on the right side of the preview. Click Edit boxed section.
Controls the appearance of panels such as organiser contact details and refund policy boxes.
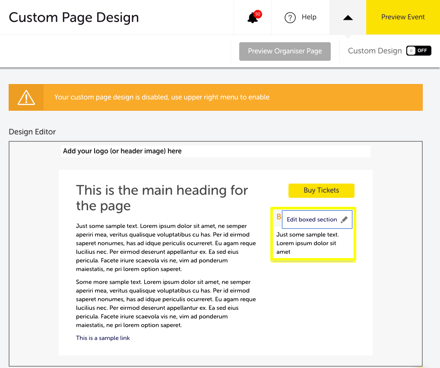
| Setting | What it does |
| Heading — colour | Text colour for box headings. |
| Heading — background | Background colour behind box headings. |
| Border — width | Width of the border around each box |
| Border — colour | Border colour. |
| Background | Background colour of the box content area. |
Buy Tickets Button
How to access: Hover over the Buy Tickets button in the preview. Click Edit buy button.
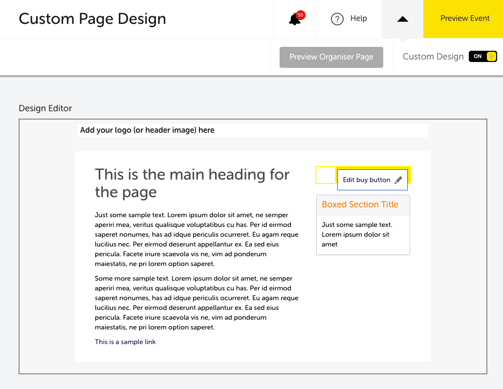
| Setting | What it does |
| Text | Colour of the button label. |
| Background | Background colour of the button. |
Previewing your design
Click Preview Event (top right of the Custom Page Design page) to see how your event page looks to ticket purchasers.
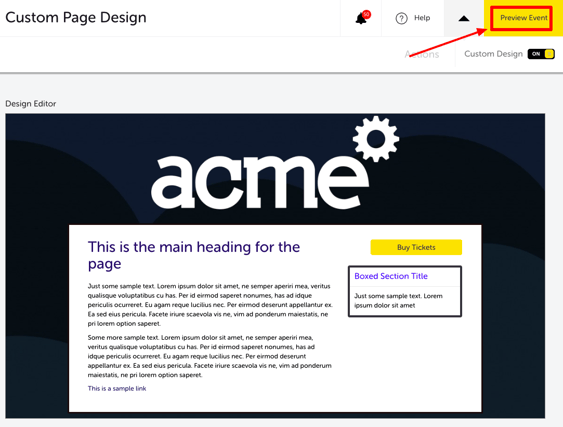
TIP: If you already have a website, match your page design colours to your website to create a consistent ticket purchasing experience for your attendees.
Important note — Global vs Event-level design
The global design applies to all your events by default. If you want a specific event to have a different look, enable a custom design at the event level — it will override the global design for that event only. All other events continue to use the global design.
See: How to customise your event page design.
Most Common Scenarios and Questions
My global design isn't showing on my event pages.
-
Check that the Custom Design toggle is set to ON. If it's OFF, the default Sticky Tickets design is shown regardless of your settings.
One of my events is showing a different design from my global design.
-
That event likely has its own event-level custom design enabled. Go to that event's Custom Page Design page and check whether the Custom Design toggle is ON. Turn it OFF to revert to the global design.
My background video isn't autoplaying.
-
This is a known browser restriction. Enable the Mute video on load setting — muting often allows autoplay to work on browsers that block it by default.
My logo looks stretched or too large.
-
Ensure your logo is within 1200w × 200h px. Images larger than this are automatically resized to fit.
Will the global design apply to events I create in the future?
-
Yes — the global design applies to all current and future events automatically, unless you set a different design at the event level.
Can I have different designs for different events?
-
Yes — set your global design as the default, then override it for specific events using the per-event Custom Page Design. See: How to customise your event page design.
Can I turn off the global design without losing my settings?
-
Yes — toggle Custom Design to OFF. Your settings are saved and can be re-enabled at any time.
Does the custom design apply to the checkout pages too, or just the event page?
-
The custom design applies to all pages during the booking process — including the ticket selection and checkout pages, not just the main event landing page.
Need more help?
If you need help setting up your global page design, contact our support team.