This guide is for operators using the Sticky Tickets Check-in App on event day. If you haven't been added as an operator yet, contact the event organiser — they'll need to set you up first. See: How to add and manage Check-in App operators.
Getting started
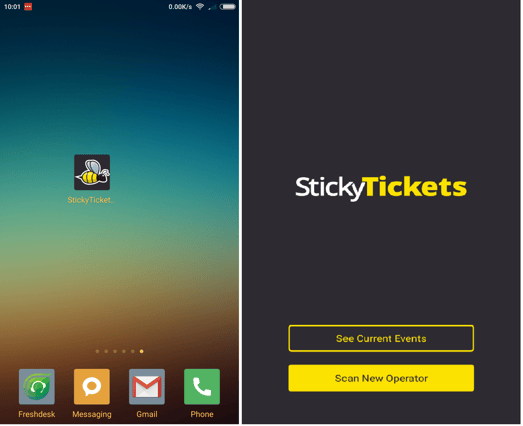
- Open the Sticky Tickets Check-in App on your device.
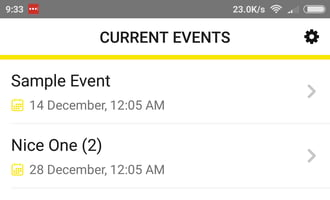
- Tap See Current Events.
- Select the event you want to check in guests for.
Note: Larger events may take longer to download. Connect to Wi-Fi before the event starts to ensure the event data is fully downloaded before guests arrive.
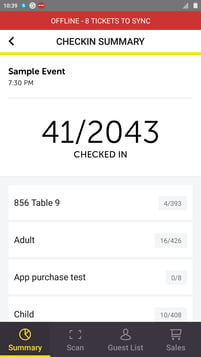
Summary Screen
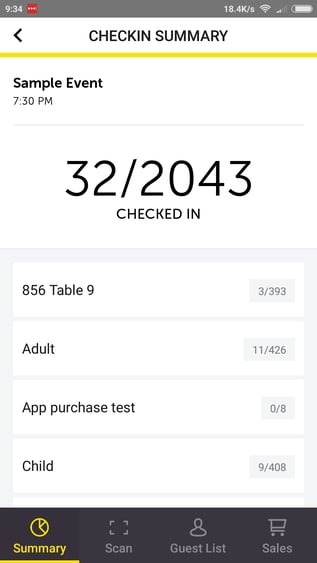
The Summary screen is your event dashboard. It shows:
- Total tickets checked in vs unchecked
- Breakdown by ticket type — checked in vs remaining
From here you can navigate to:
- Scan — scan QR codes and barcodes
- Guest List — search and manually mark off attendees
- Sales — process door sales
Scan Screen
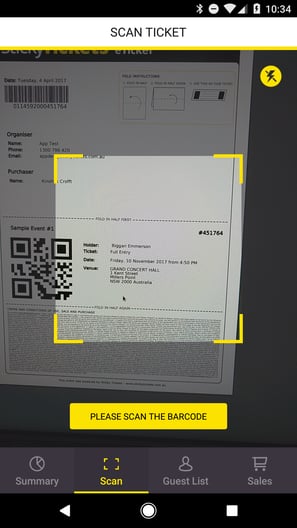
Point your device's camera at the QR code or barcode on the ticket. You can scan from a phone screen or a printed ticket.
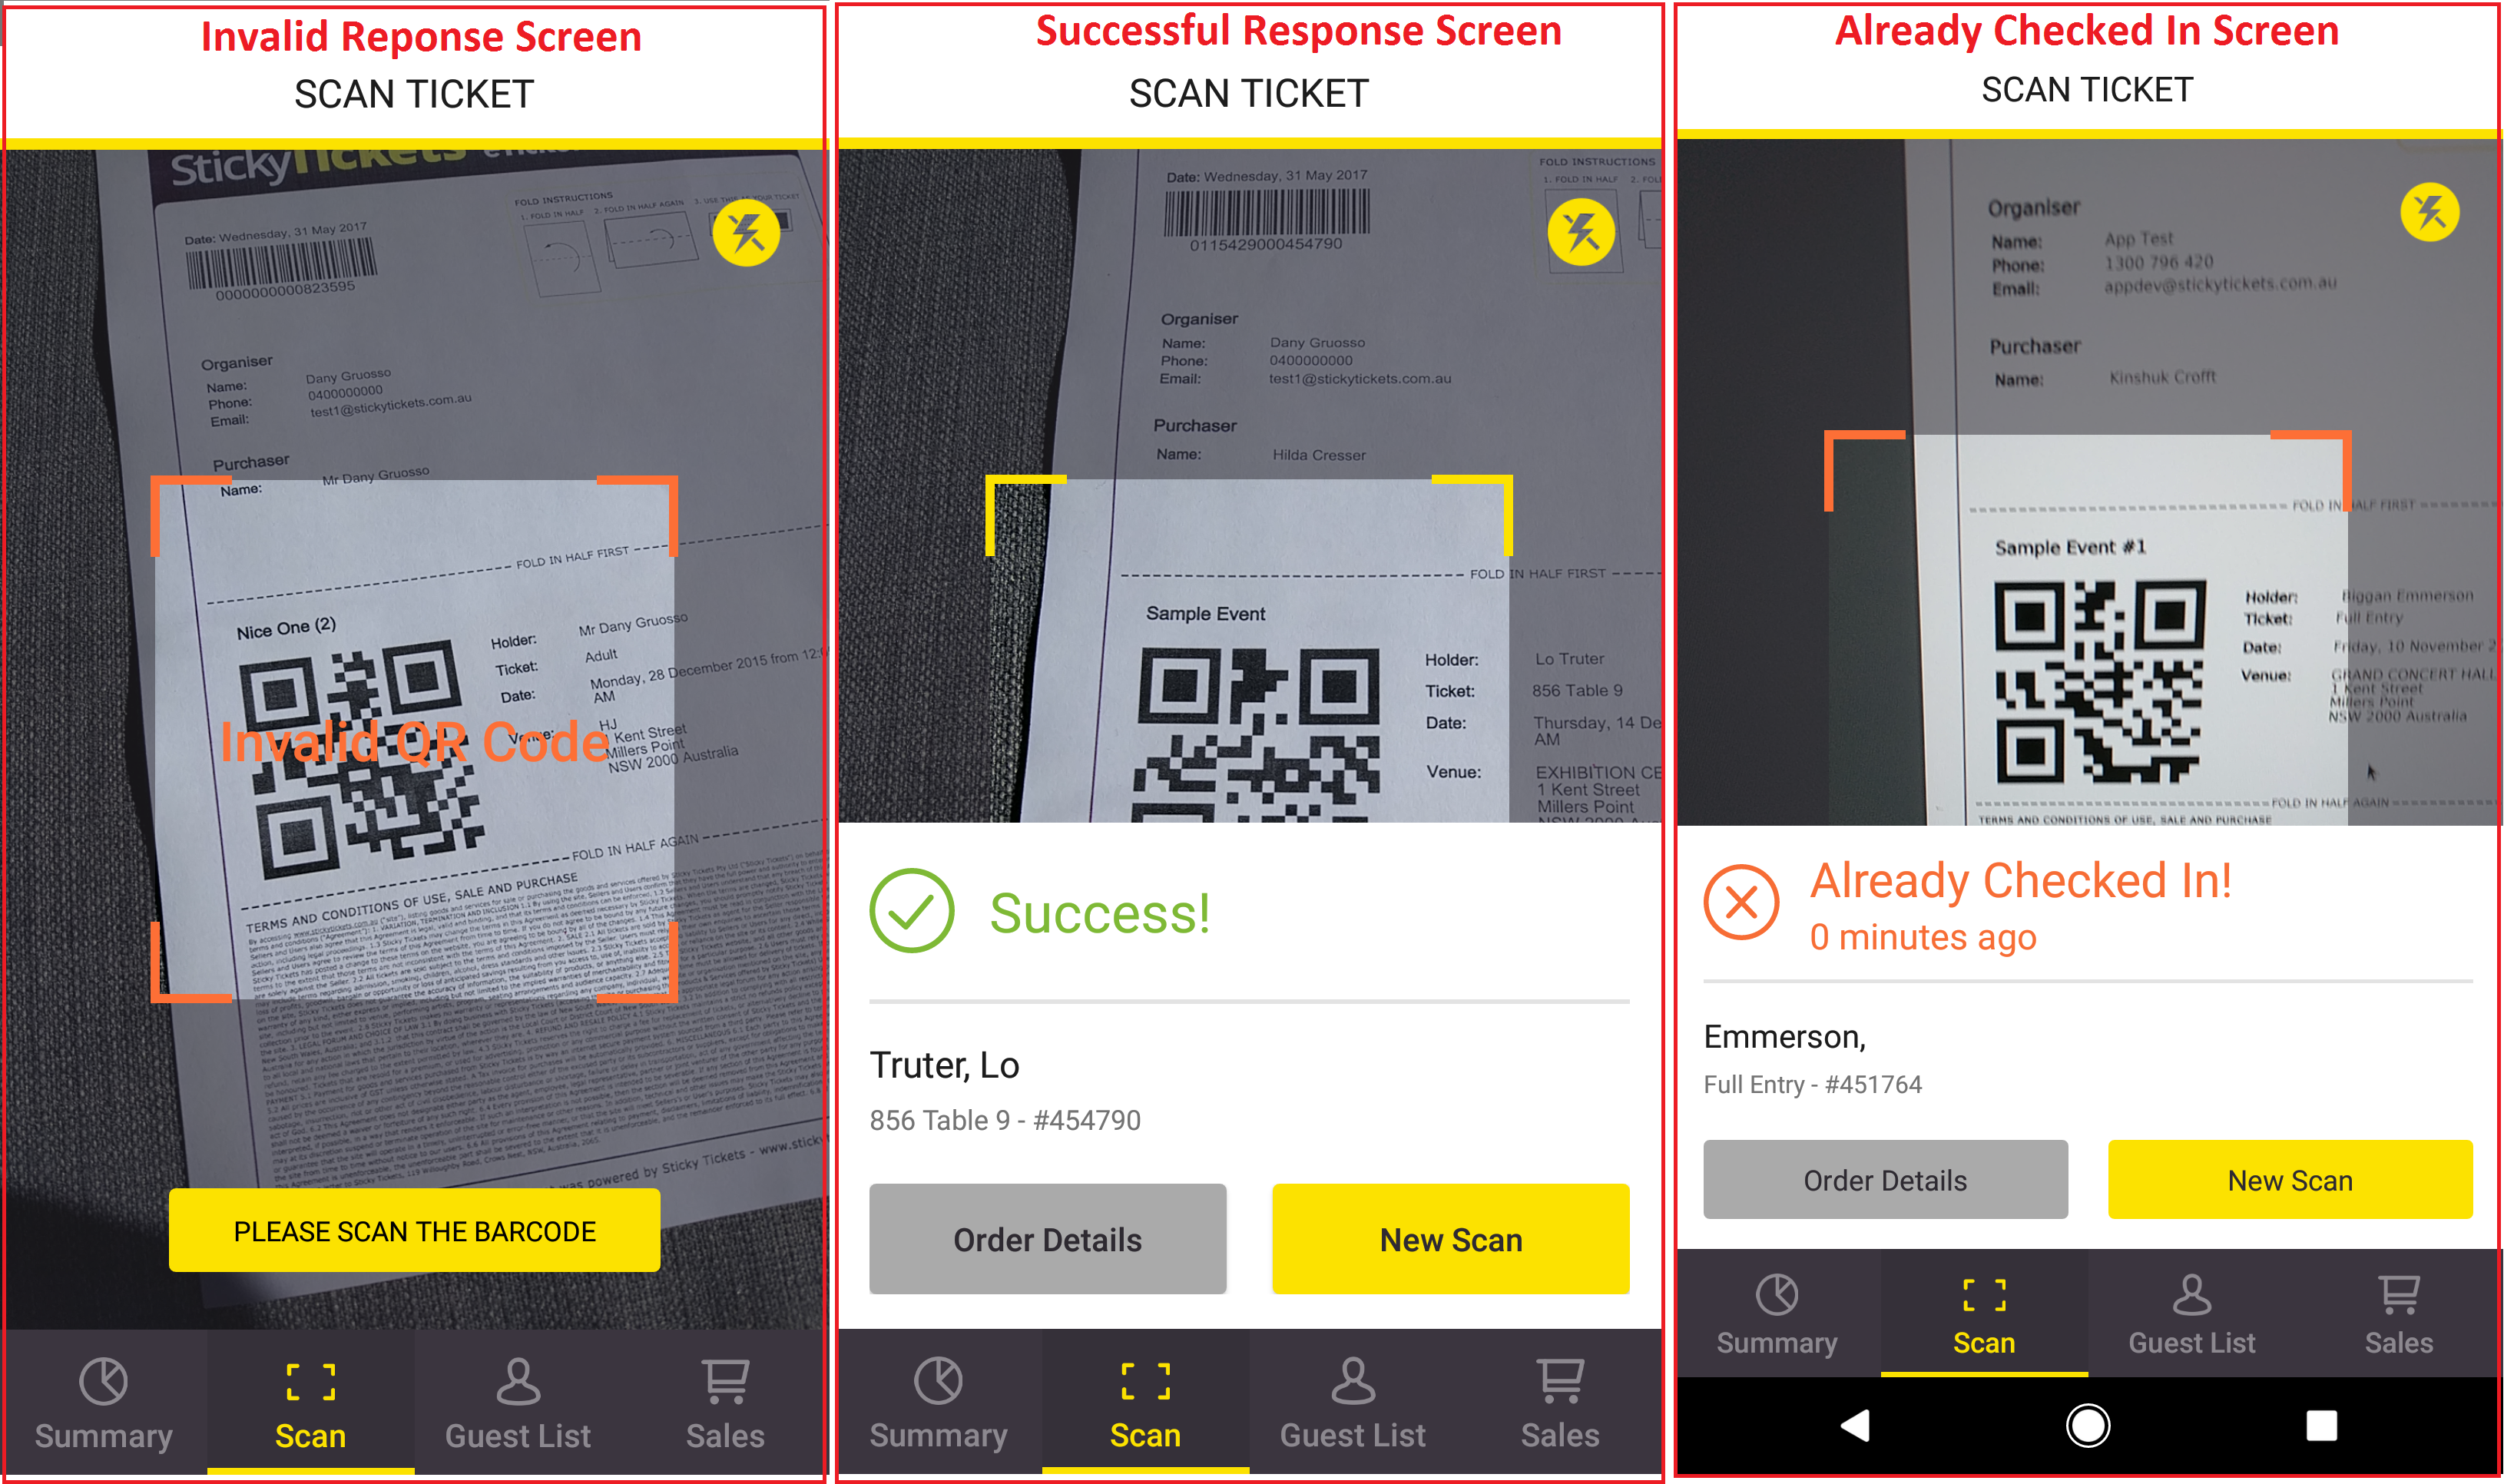
Scan responses
| Response | Signal | What it means |
|---|---|---|
| Success | 1 long beep | Ticket valid — guest checked in |
| Invalid Code | 3 beeps | This QR code does not apply to this event |
| Already Checked In | 3 beeps | This ticket has already been scanned |
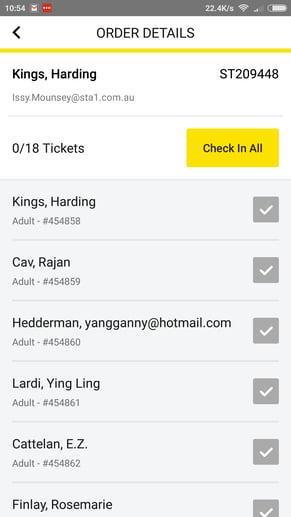
Checking in a Group order
After a successful scan, if the guest is part of a multi-ticket order, tap Order Details to see all tickets attached to that order. You can check in the remaining guests individually or tap Check-in All if everyone in the group is present — no need to scan each ticket separately.
Low light? Tap the flash icon in the top right corner of the Scan screen to activate your device's flash. Be aware this drains your battery quickly — connect to a power source or have a spare battery available.
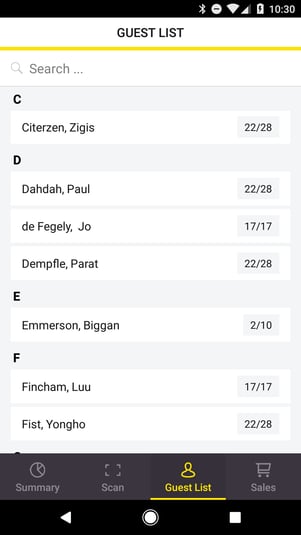
Guest List screen
Use the Guest List to find and manually check in attendees without scanning.
To search: Enter a name (first or last), email address, or scroll through the list. Use the alphabet bar at the top of the screen to jump to a section quickly.
To check in: Tap the attendee's name. If the order has multiple tickets, a new screen shows all tickets on the order — check them in individually or tap Check-in All.
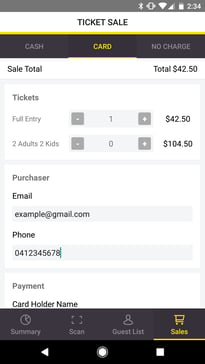
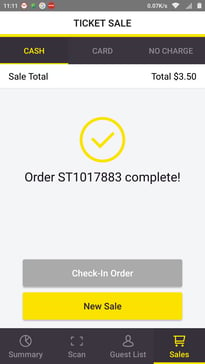
Sales Screen
Process door sales directly in the app — accept cash, credit card, or no-charge transactions.
- Enter the ticket purchaser's email address to send them a receipt by email.
- Enter a mobile number to send an SMS with a link to their receipt.
- After a successful payment, you can either check in the order immediately or start a new sale.
Controlling which tickets appear on the Sales screen: Go to your ticket settings in the event admin area and set the Sales Channel to Check-in App only for door-sale ticket types. You can also use the discount code required setting to show specific ticket types on the app only — useful for higher door-price tickets.
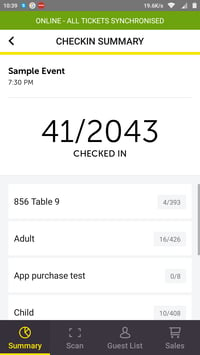
Offline Mode
The app works without mobile reception. As long as you downloaded the event data while connected to the internet before the event, the app will continue to record check-ins offline. When your device reconnects, all data syncs automatically to the event database and any other check-in devices.
A status bar in the app shows whether the app is offline or has successfully synced.
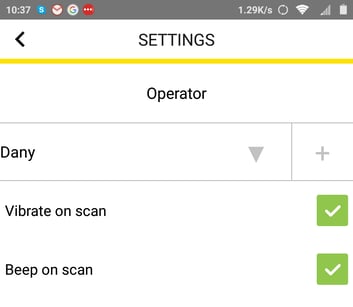
Managing operator settings in the app
To change operator settings or add a new operator from within the app:
- On the Summary screen, tap the back button (top left) to return to the Current Events page.
- Tap the cog icon (top right) to access operator settings.
- Make your changes and tap back to return to the Current Events list.
- To add a new operator, tap the + icon and scan the operator's QR code.
For full operator setup instructions, see: How to add and manage Check-in App operators.
Most Common Scenarios and Questions
The app shows Invalid Code when I scan a valid ticket.
-
Confirm you are on the correct event in the app. If the event has multiple sessions, make sure you've selected the right session. If the problem persists, contact the event organiser to verify the ticket is valid.
The event is taking a long time to load.
-
Large events take longer to download. Connect to Wi-Fi before the event starts and download the event data in advance rather than at the gate.
The app is not syncing after coming back online.
-
Check that your device has reconnected to mobile data or Wi-Fi. The app syncs automatically once a connection is detected — if it doesn't, try closing and reopening the app.
Can I use the app on multiple devices at the same event?
-
Yes — multiple operators can check in guests simultaneously. All devices sync in real time when connected, and sync automatically once reconnected after offline use.
What happens if I accidentally check in the wrong ticket?
-
Contact the event organiser — they can reverse a check-in from the event admin area if needed.
Can I see how many tickets have been checked in at any time?
-
Yes — the Summary screen updates in real time and shows total check-ins vs remaining for each ticket type.
Need more help?
If you need help using the Check-in App on event day, contact our support team.