If you have already set up an event and need to make any changes, please follow these steps. However, please note that if you wish to modify the date, time, or venue of a past event, you will need to contact support@stickytickets.com.au for assistance with these updates.
1. Log in to your Sticky Tickets account. In the "My Events" page, locate and select the event you wish to update or modify.
2. Once you've selected the event, navigate to the "Edit Event" tab.
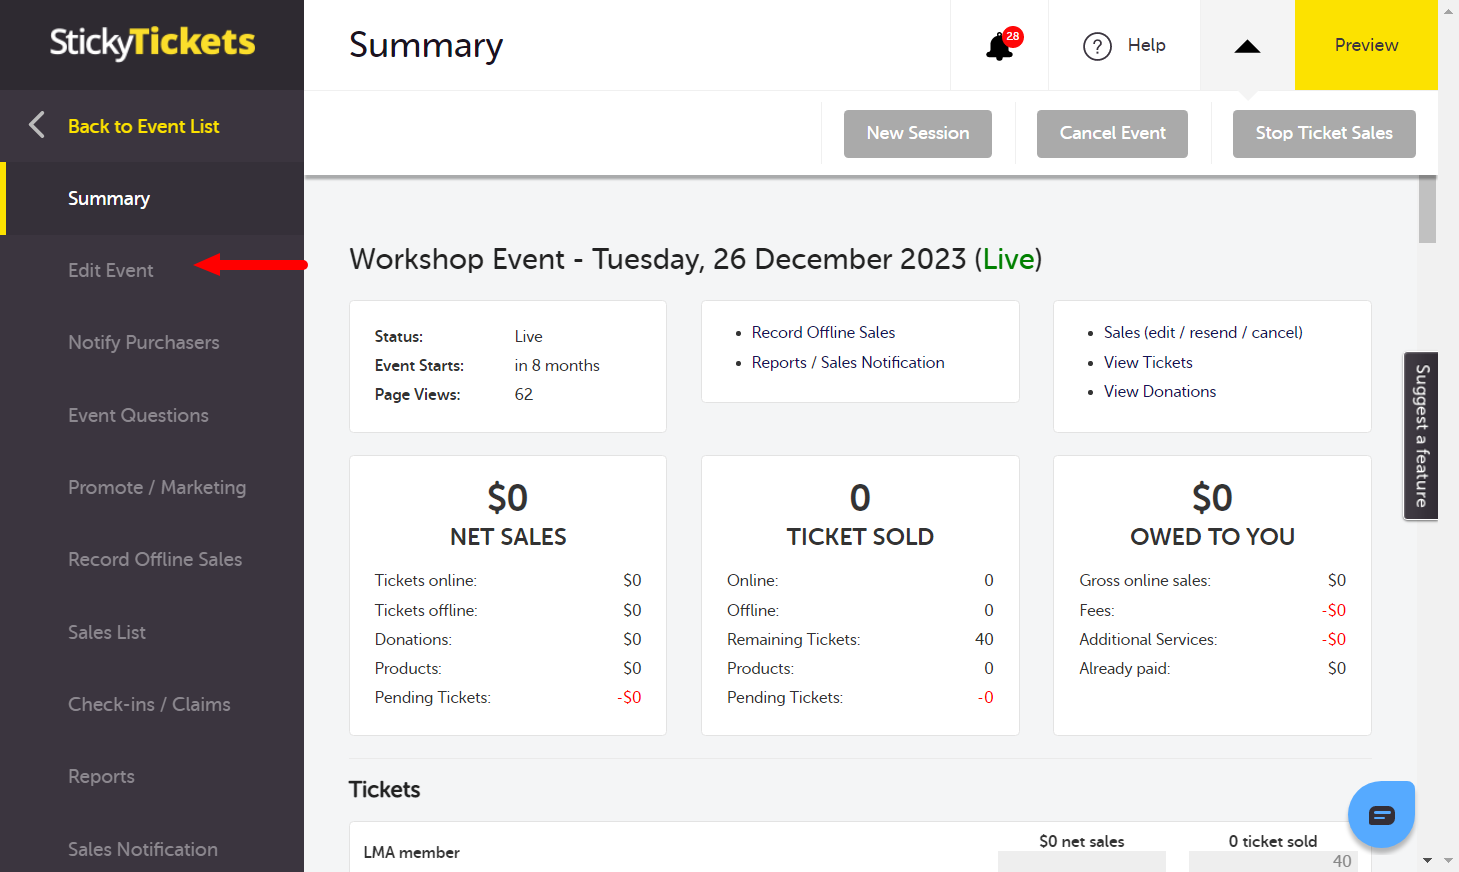
3. Within the "Edit Event" tab, you'll find various sections that you can modify. Click on the edit icon for each section you want to update.
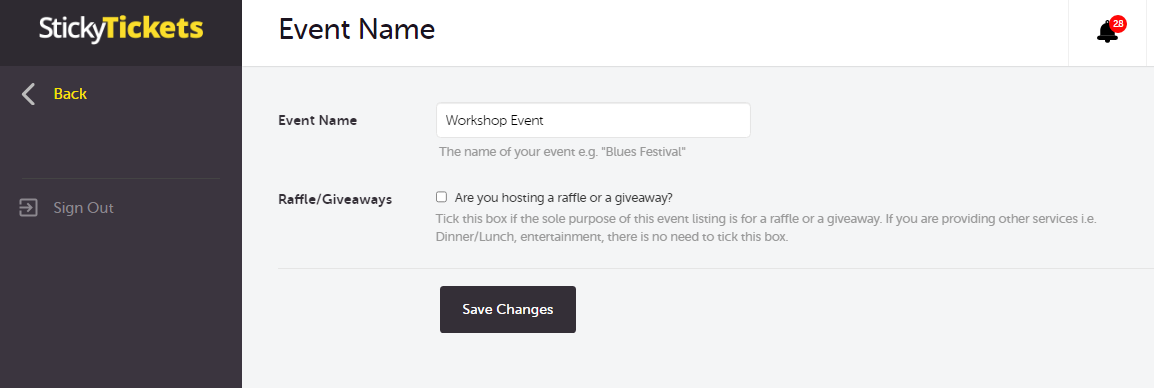
Name Section
This is where you can edit your event name. After making your changes, be sure to click "Save Changes" to confirm the update.
Event Date Section
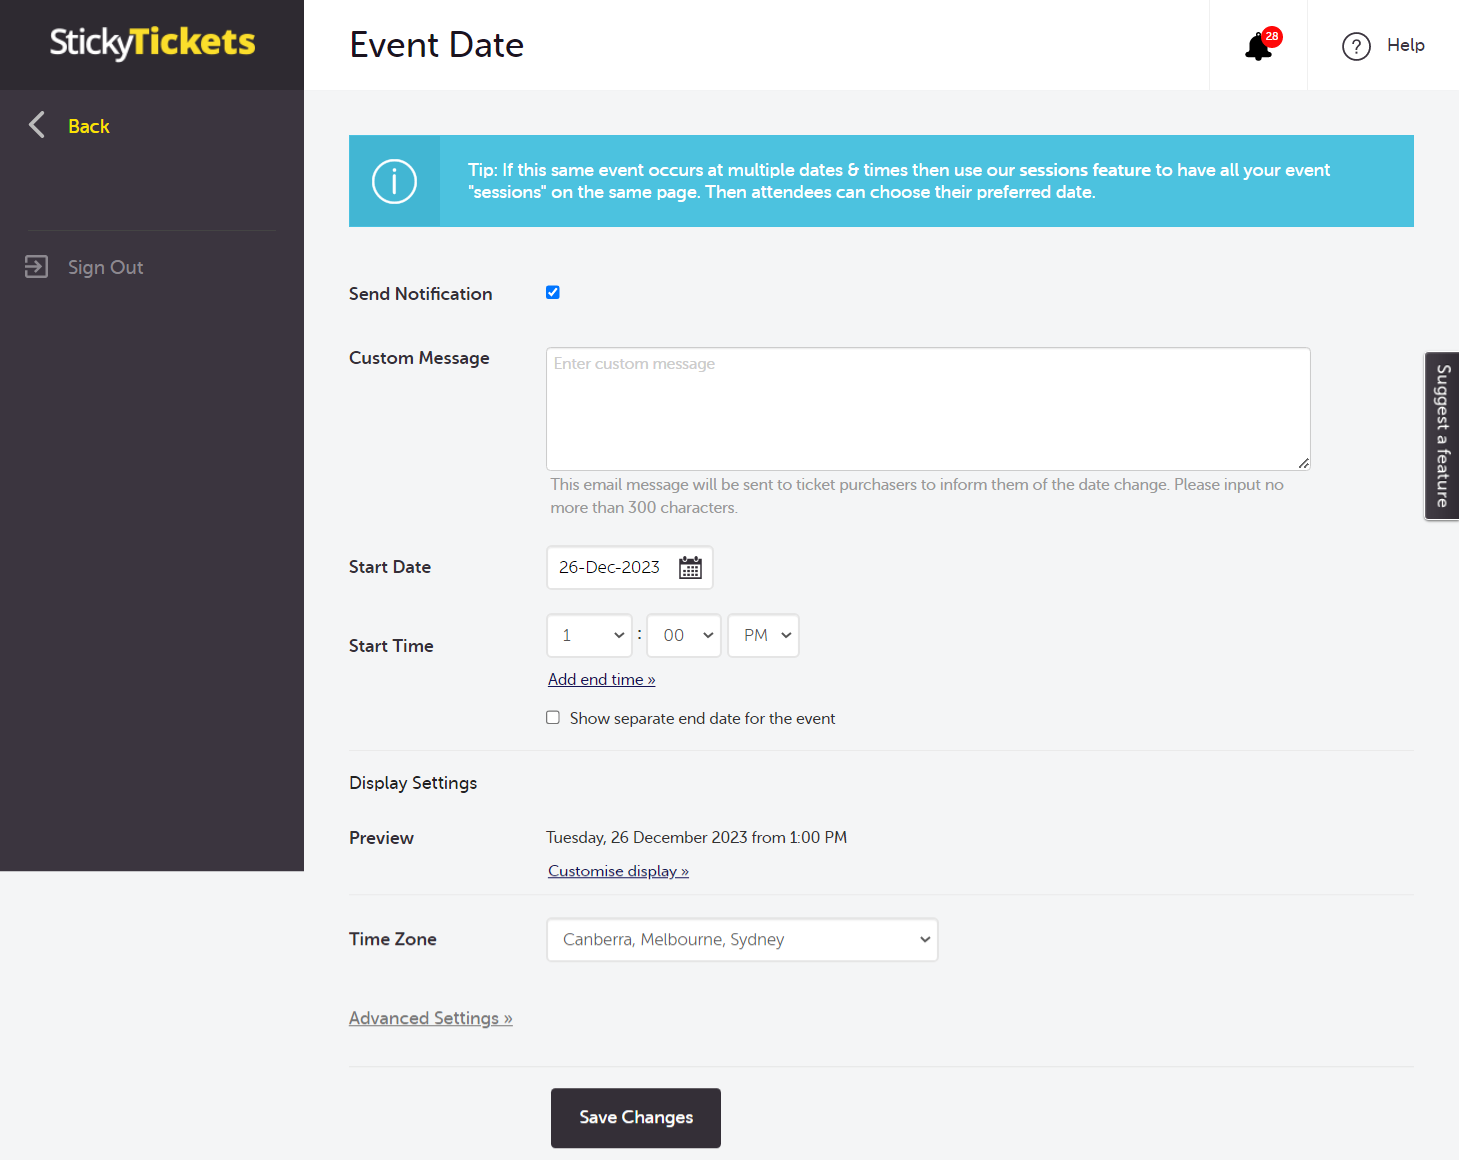
If you need to change the date of your event, navigate to the "Event Date" section. Please note that changing the date after ticket sales have started will not affect the start of ticket sales.
- Send Notification Checkbox: Check this box if you want to send an email notification to all current ticket holders regarding the date/time changes. You can also add a custom message to the notification.
- Custom Message: You can also add a custom message to the notification.
- Start Date: Adjust the date of your event as needed.
- Start Time: Modify the start time of your event.
- Display Settings: Customise how your event time is displayed. Refer to the provided link for more information.
- Time zone: Select the appropriate time zone for your event. This is used for calculating the start time of your event.
After making the necessary changes in the Event Date section, remember to click "Save Changes" to apply the modifications.
Event Location Section
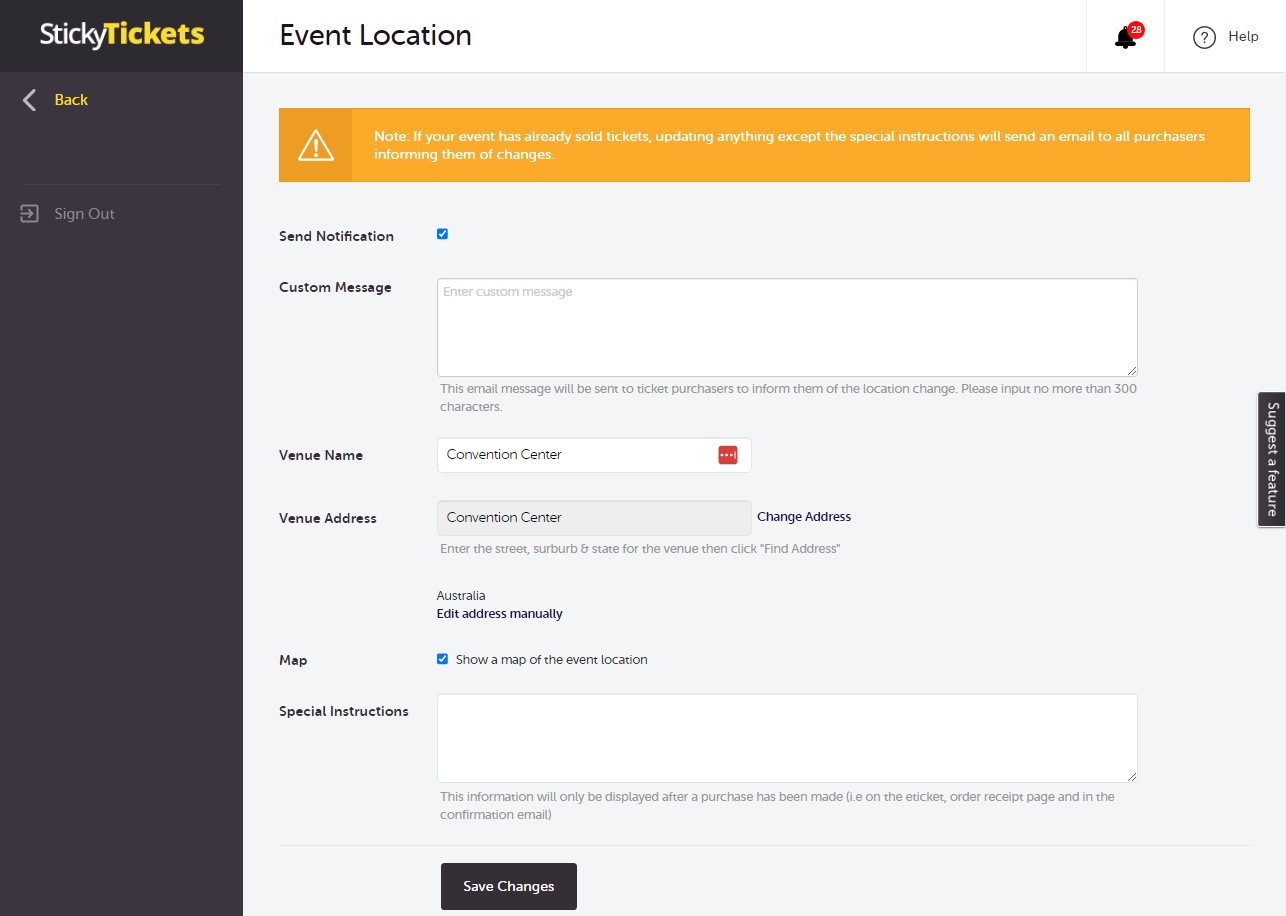
To modify the date of your event, navigate to the Location section of your event.
- Send Notification Checkbox: Check this box if you want to send an email notification to all current ticket holders regarding the changes you made to the event location and address.
- Custom Message: You can add a customized message that will be included in the email notification sent to all current ticket holders.
- Venue Name: Update this field if the venue name needs to be changed.
- Venue Address: Click the "Change Address" link if you wish to update the address of your event.
- Show Map: Check or uncheck this box to enable or disable the display of a map showing your event's location.
- Special Instructions box: Add or update any additional information you wish to provide to your guests in this field. This will also appear in the Order Confirmation and E-tickets.
Click Save Changes to save this section.
Event Organiser Section
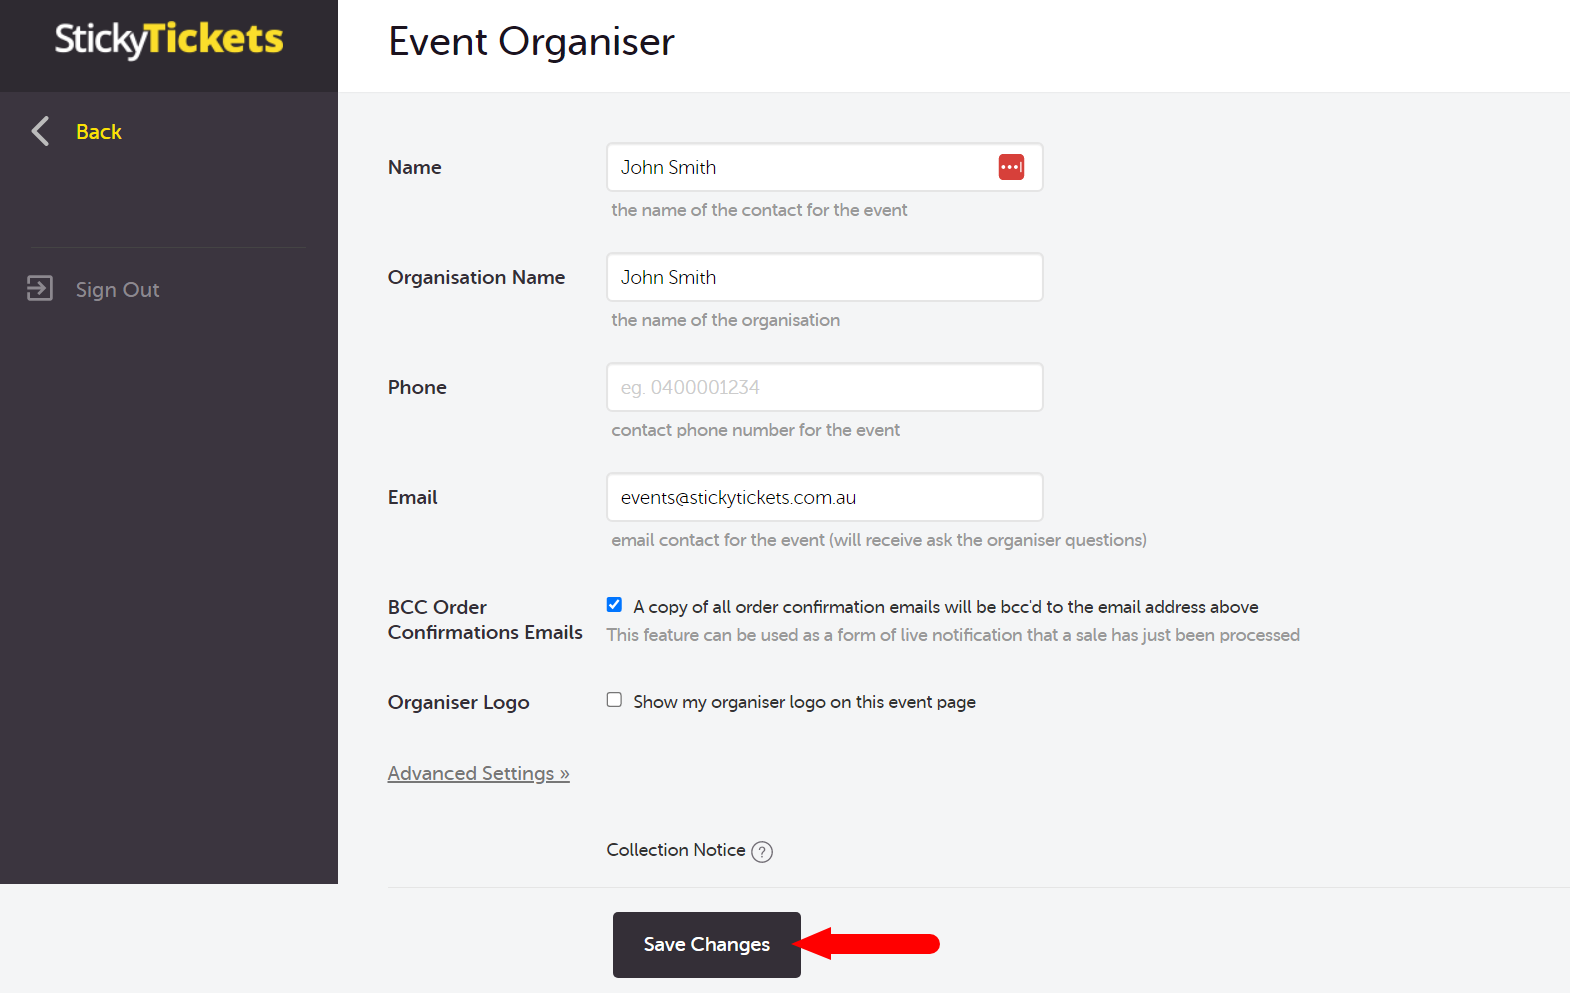
To modify the contact information you wish to publish for your event, navigate to the Organiser section of your event. Your guests can use this contact information if they have any inquiries about your event.
- Name: Enter the name of the person who your guests can reach out to for inquiries.
- Organisation name: Enter your company or organisation name.
- Phone number: Provide the main contact number your guests can call for any event inquiries. You can leave this field blank if you do not wish to display a contact number.
- Email Address: Enter the email address that will be included in the email confirmation, which your guests can email for any event inquiries. Note that this field is required.
Click Save Changes to save this section.
Refund Policy
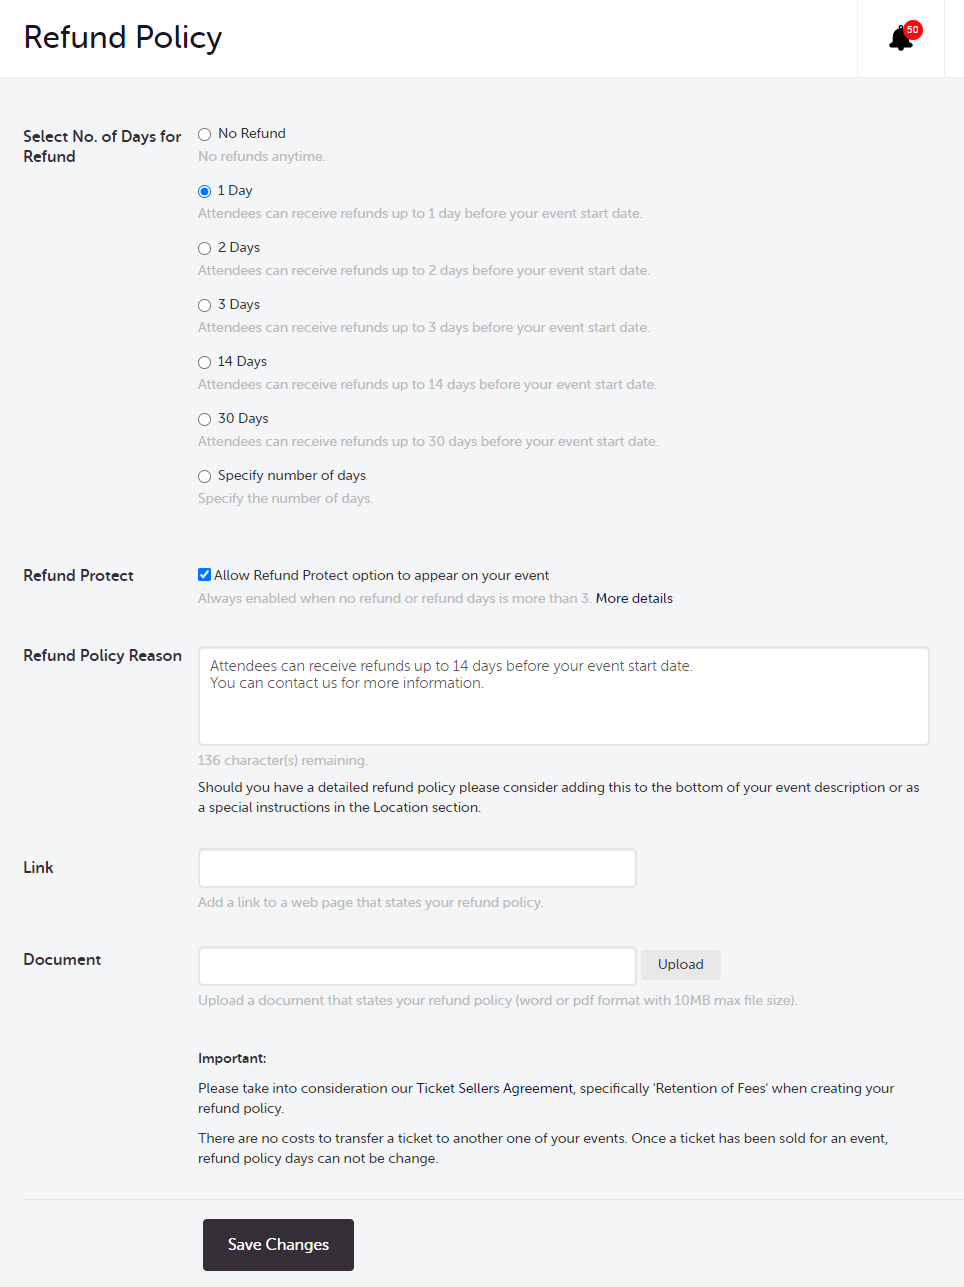
To modify the event's refund policy, navigate to the Refund Policy section of your event. When updating this section, please carefully note the following:
- Keep in mind that if your event has sessions, changes to this section will apply to all sessions.
- Note that you can only make changes to the refund policy if your event is still in pending status or has not sold any tickets. Once you have sold at least one ticket, this section will be locked.
- Understand that if the policy is changed, tickets that were purchased before the changes will remain unaffected.
Description Section
In this section, you have the opportunity to provide a detailed description of your event and enhance it with visual elements. Here's how you can make the most of this section:
- Full Description: This is where you can showcase all the important details about your event. Utilise the formatting tools available to customize the appearance of your description. Additionally, you can upload images directly into the description to make it more visually appealing. Consider including information about speakers/presenters, what attendees can expect, what's included in the ticket price, and why people should attend your event. Crafting a creative and informative description can significantly help in attracting attendees and selling tickets.
- Image Gallery: Enhance the visual appeal of your event page by uploading up to three images to accompany your event description. These images should be in JPEG, PNG, or GIF format. Keep in mind that the first image uploaded will serve as the thumbnail for your event and will be displayed prominently on the Find Tickets/Search pages if your event is public. Use captivating images that reflect the essence and atmosphere of your event to entice potential attendees.
By leveraging the Full Description and Image Gallery sections effectively, you can create an engaging event page that captures the interest of your target audience and encourages them to purchase tickets.
Click Save Changes to save this section.

Tickets
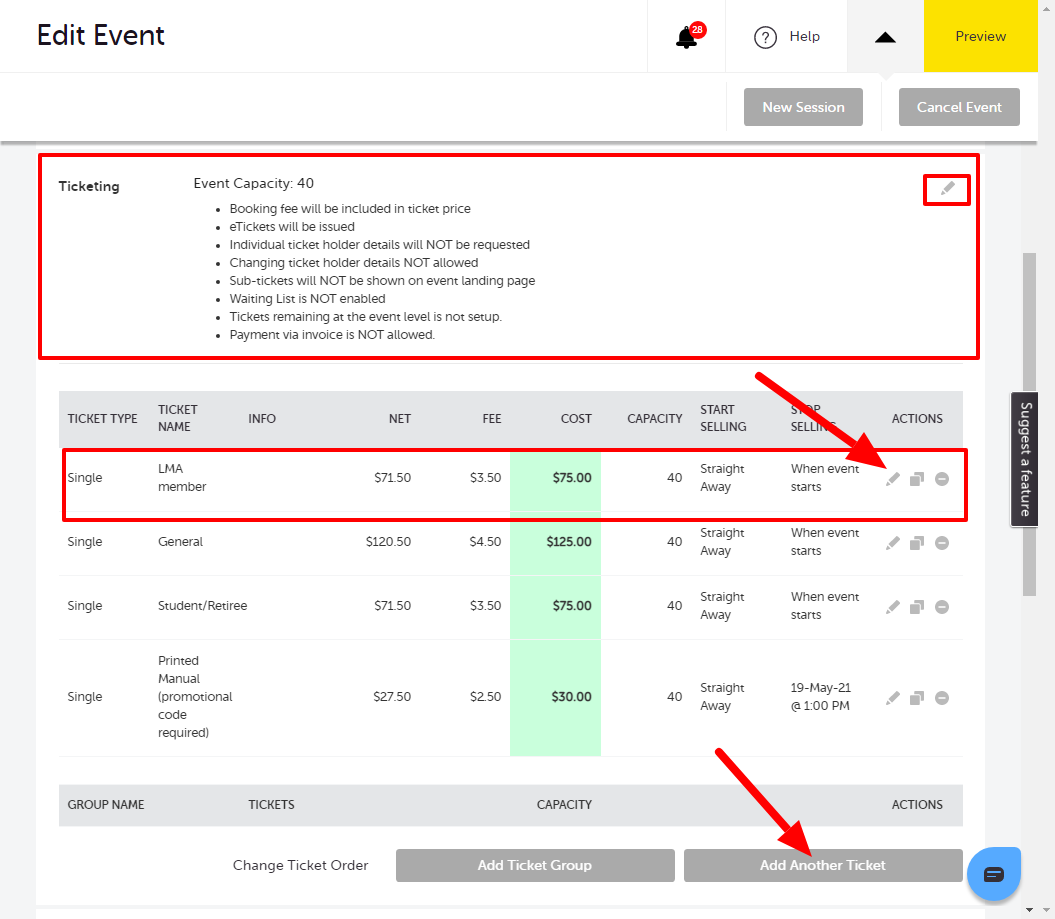
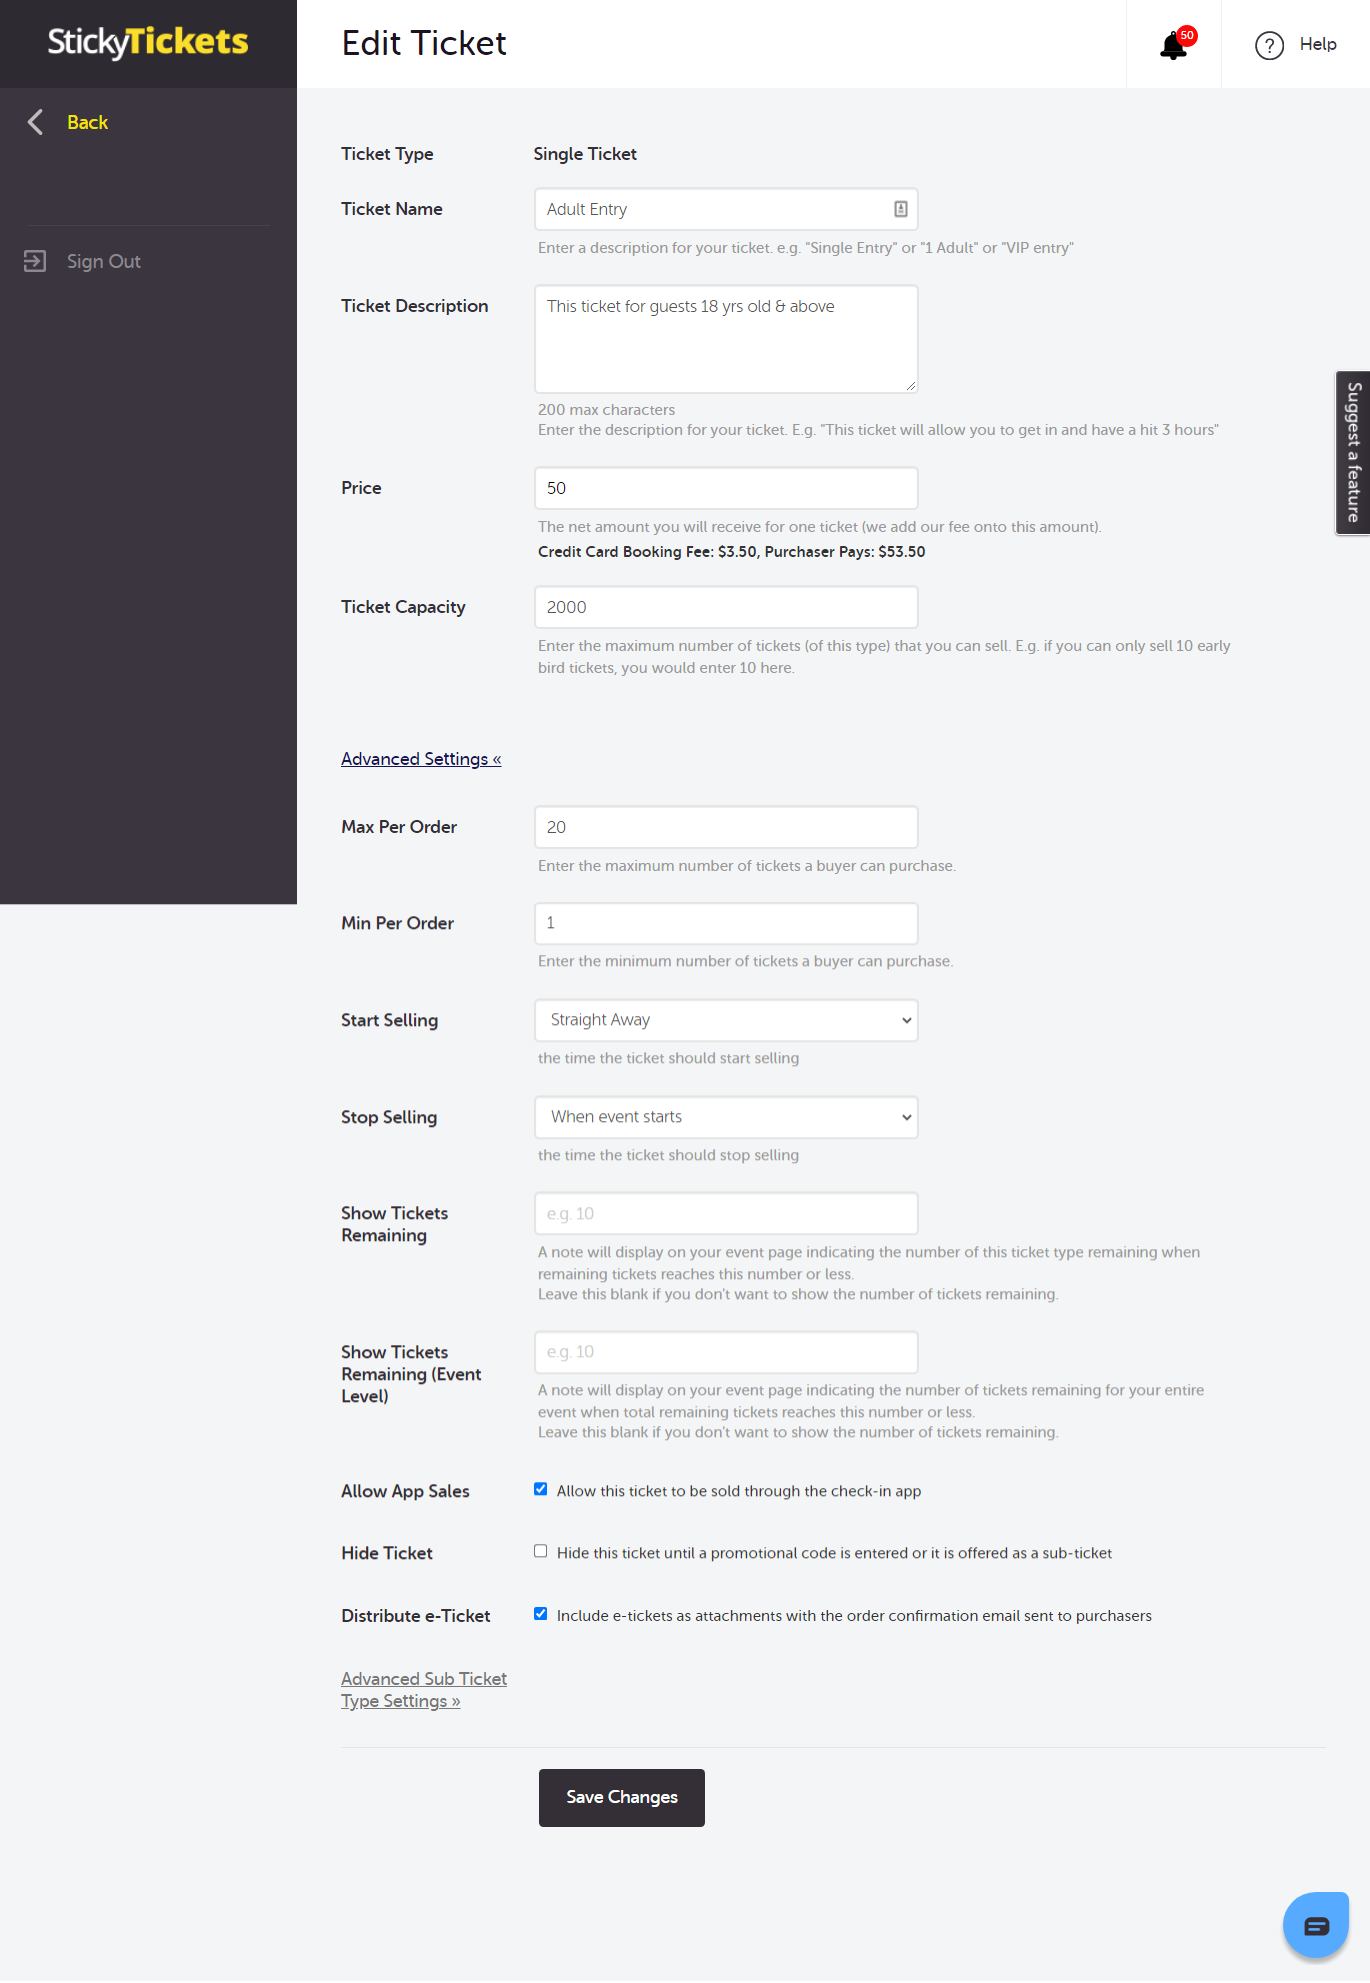
Select which part of the ticketing you would like to edit.
-
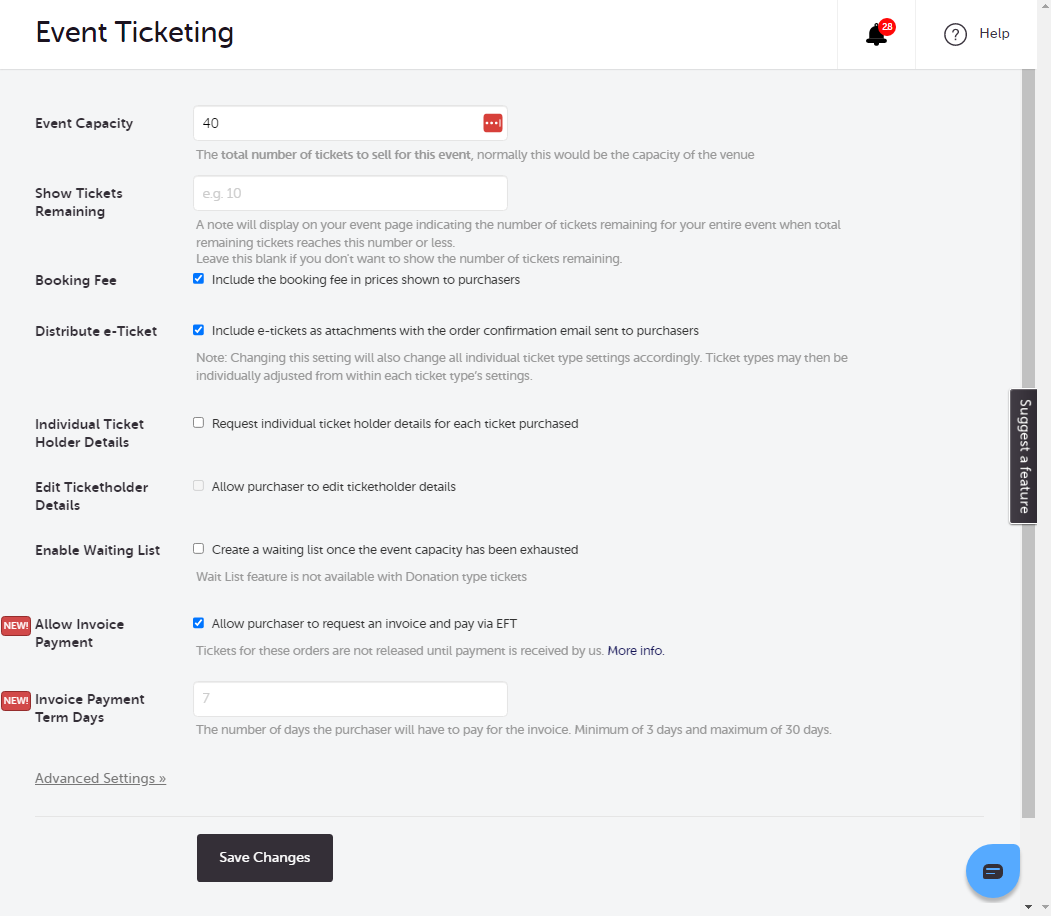
Event Capacity - The total number (of all tickets) that can be sold for this event. Your event will be sold out if the total number of tickets sold exceeds this number (or if all individual ticket limits are exceeded).
-
Booking Fee - Includes the booking fee in prices where displayed. If booking fees are to be included you must specify the price BEFORE the fee is added, as the system will automatically update the price to include the booking fee. Should you choose not to include the booking fee, the client will be notified that the advertised ticket price 'does not include booking fee' and will be charged the additional fee at the time of purchase.
-
Issue eTicket - Automatically issue e-tickets. At the time of ticket purchase/registration, your attendees will be emailed an automated tax receipt from Sticky Tickets on your behalf as well as an automated e-ticket, unless you choose not to.
-
Distribute e-Ticket - Choose whether to include or exclude e-tickets in the order confirmation email that will be sent to the purchasers.
-
Individual Ticket Holder Details - Request individual names from multiple ticket purchases. With this option, you can request individual names for each ticket purchased, which is useful when selling large tables. One purchase is made (a table of ten for example) and ten tickets are issued. The ticket purchaser will be given an opportunity to enter and allocate an individual's name to each ticket. A 'copy to all' button is available on the 'Buy Tickets' page if the purchaser decides to fill all ticket holder details under their name.
-
Edit Ticket Holder Details - If the checkbox Individual Ticket Holder Details is enabled, you can choose to allow ticket holders to modify their details or not from the My Tickets page.
-
Enable Waiting List - if checked means you will allow guests to sign up for the waiting list once the ticket type is marked as sold out.
-
Allow Invoice Payment - Organisers can enable this feature that will allow purchasers to reserve tickets for their events and pay through Invoice
-
Invoice Payment Term Days - If "Allow Invoice Payment" is enabled, this field will allow organisers to set how many days will the purchasers have for them to process the payment for the invoice before it expires.
Note: For events with multiple sessions, you can edit your ticket settings per session or across all sessions. To edit across all sessions, tick the box below.

Promotional Codes
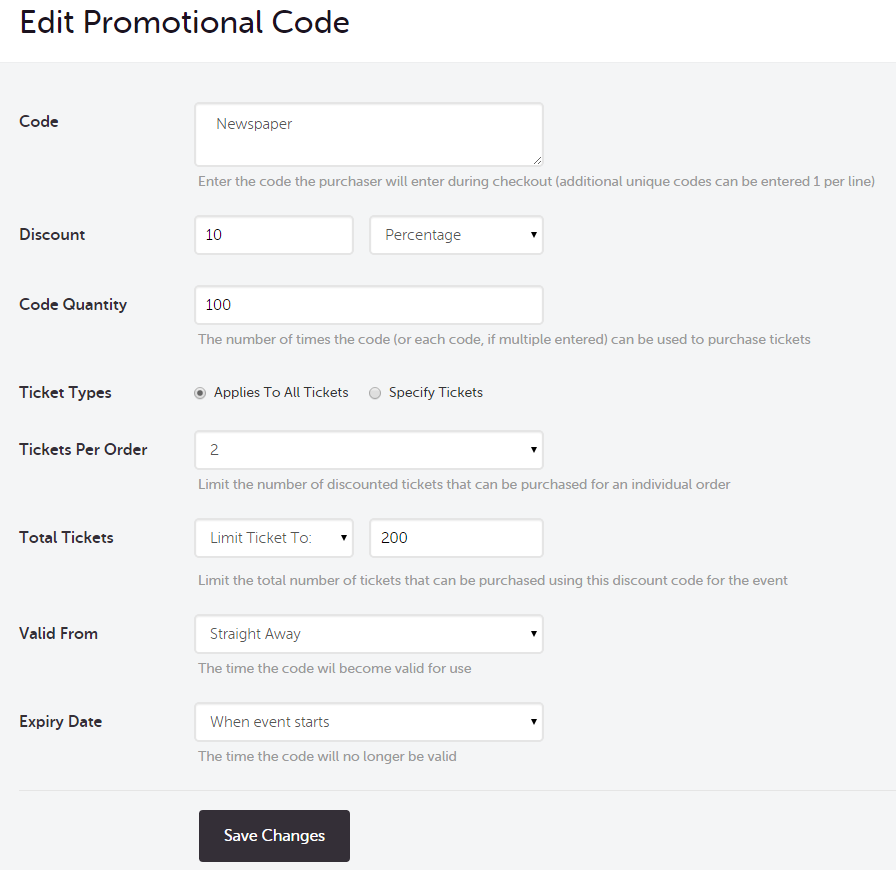
Edit your promotional code settings by selecting the 'Edit' link. Select Save Changes.
Note: For events with multiple sessions you can edit your promotional code settings per session or across all sessions. To edit across all sessions tick the box below.

Privacy
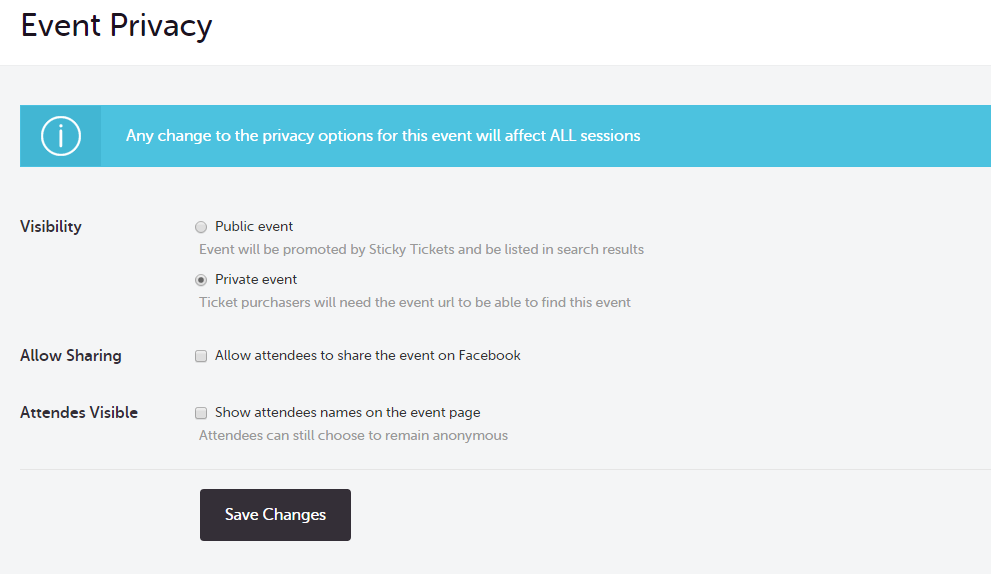
Click on the Privacy section to change the settings
- You can create a Public Event or a Private Event. Public events will be promoted by Sticky Tickets and will be discoverable via the event search feature. For private events you will need to provide the URL directly to your attendees (via email for example).
Each option is explained below.Each option is explained below.
- Search Categories (public event only) - If you tick this checkbox your event will be easily accessible to anyone searching the Sticky Tickets site. They will be able to both view and purchase tickets to your event. Alternatively, by leaving the box blank only those who have been given the event URL by you (shown at the bottom of the event ad on completion) will be able to find the event and purchase tickets.
- Attendees Visible - If you tick this checkbox a guest list will be seen at the bottom of your event page. The ticket purchaser has an option when purchasing tickets to not show their name on the event page (their tickets will show as ANONYMOUS).
- Allow Sharing (private event only) - Checking this box will allow your attendees to use the 'share' feature on Sticky Tickets. They will be able to Send To A Friend and Like or Share On Facebook.
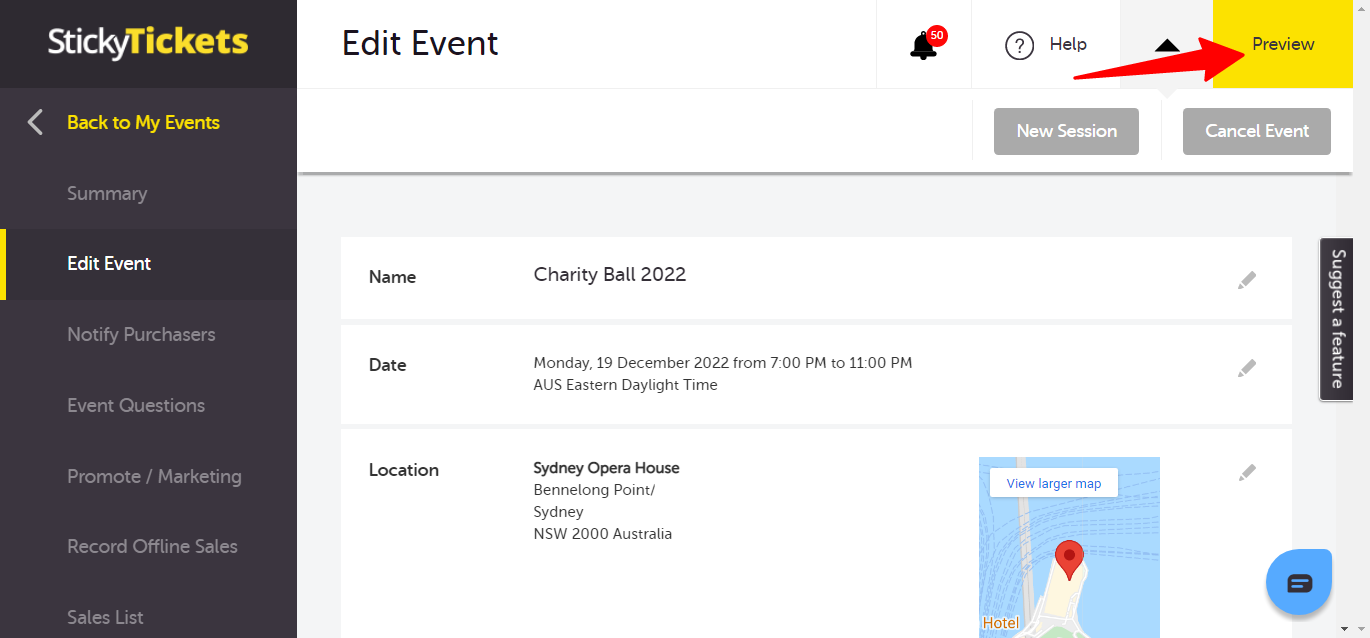
Use the 'Preview' link to view your changes.
If you have questions about editing your event or anything else, please do not hesitate to contact us at support any time and we'd be more than happy to assist.