Your organiser page is a public-facing profile page on Sticky Tickets that lists all your live public events in one place. It has a consistent URL you can include in marketing materials — the URL stays the same regardless of how many new events you create.
Setting up your organiser page is optional, but it's a useful tool if you run events regularly and want a single destination to direct ticket purchasers to.
How to access the organiser page settings
- Log in to your Sticky Tickets account.
- In the left sidebar, go to Organiser Settings → Organiser Page.
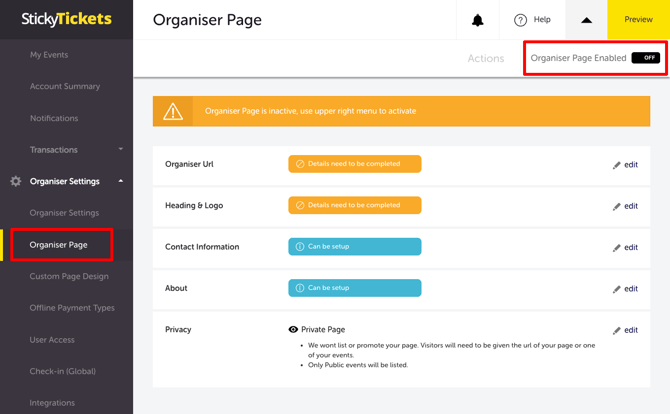
Step 1 — Enable your organiser page
Toggle Organiser Page Enabled to ON in the upper right of the page.
When the toggle is OFF, the orange warning banner reads: "Organiser Page is inactive, use upper right menu to activate." Your page is not visible to the public until the toggle is ON (see image above).
Step 2 — Set your organiser URL
Click edit next to Organiser Url.
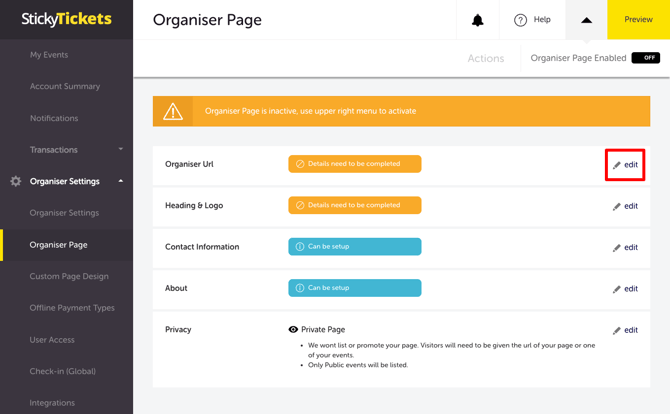
| Field | What to enter |
| Url Address | Enter the last part of your organiser page URL — the part after https://www.stickytickets.com.au/ |
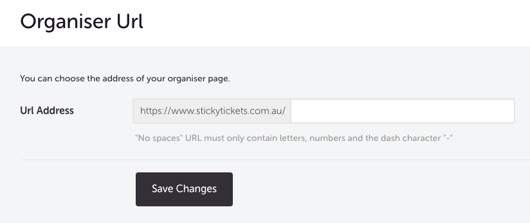
URL rules: No spaces. Use letters, numbers, and the dash character (-) only. Choose something short and memorable — ideally your organisation name (e.g come-meet-us or you-with-mary)
Example: Entering YogaWithMary gives you the URL: https://www.stickytickets.com.au/YogaWithMary
Click Save Changes.
Step 3 — Add a heading and logo
Click edit next to Heading & Logo.
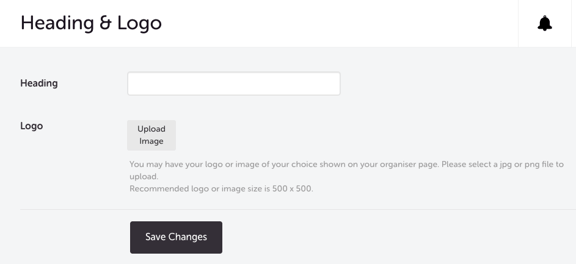
| Field | What to enter |
| Heading | Your organisation or brand name as it will appear at the top of your organiser page |
| Logo | Upload a JPG or PNG image. Recommended size: 500 × 500px. Your logo will appear on your organiser page and can optionally appear on your event pages. It will also be included in sales notification emails if that setting is enabled. |
Click Save Changes
Step 4 — Add contact information (optional)
Click edit next to Contact Information and enter your the contact person's details. This information is displayed on your organiser page so ticket purchasers can reach you. You can also include your organisations' social media links.
Step 5 — Add an About description (optional)
Click edit next to About and enter a free-text description of your organisation. Use this to give ticket purchasers context about who you are and what kind of events you run.
Step 6 — Set your privacy
Click edit next to Privacy and choose:
| Option | What it means |
| Public page | Your organiser page is listed and promoted on Sticky Tickets. All your public live events appear on the page. |
| Private page (default) | Your page is not listed or promoted. Visitors must be given your direct URL or a link to one of your events. Only public events are listed. |
Previewing your organiser page
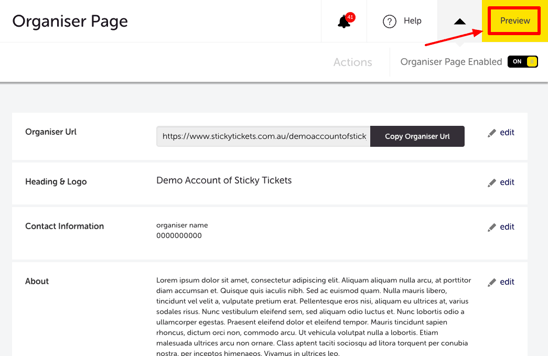
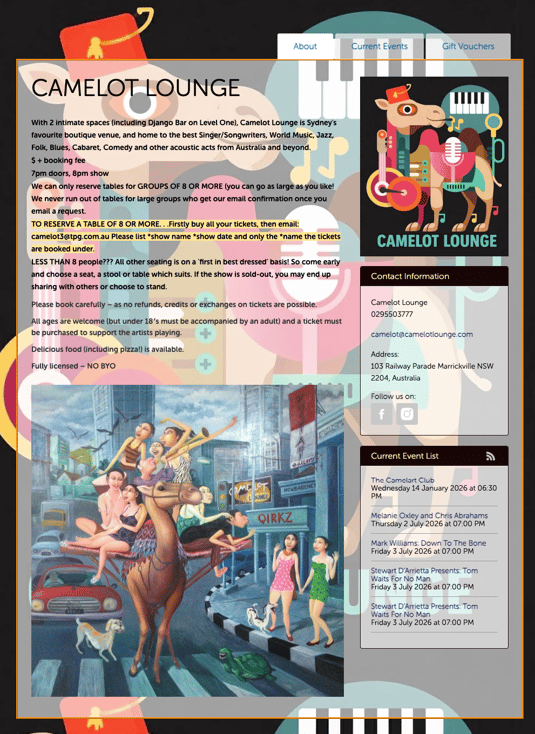
Click the Preview button in the top right of the Organiser Page settings to see how your page looks before sharing the URL.
Most common scenario and questions
Do I have to set up an organiser page?
-
No — the organiser page is optional. Your events can be created and published without it. It's most useful for organisers who run events regularly and want a permanent URL to use in marketing materials.
Can I change my organiser page URL after setting it?
-
Yes — return to Organiser Settings → Organiser Page and click edit next to Organiser Url. Be aware that changing your URL will break any links you've already shared using the old URL.
Will my private events appear on my organiser page?
-
No — only public live events are listed on your organiser page, regardless of your page's privacy setting.
What's the difference between a public and private organiser page?
-
A public page is listed and promoted on Sticky Tickets search results. A private page is accessible only via direct link — it won't appear in searches. Both pages only show public events.
Can I have different designs for my organiser page?
-
Yes — you can customise your organiser page's visual appearance using the Custom Page Design settings in Organiser Settings. See: How to set up a global design for all your event pages.
Need more help?
If you need help setting up your organiser page, contact our support team.