To seamlessly connect your sales to your MailChimp account, follow these steps:
-
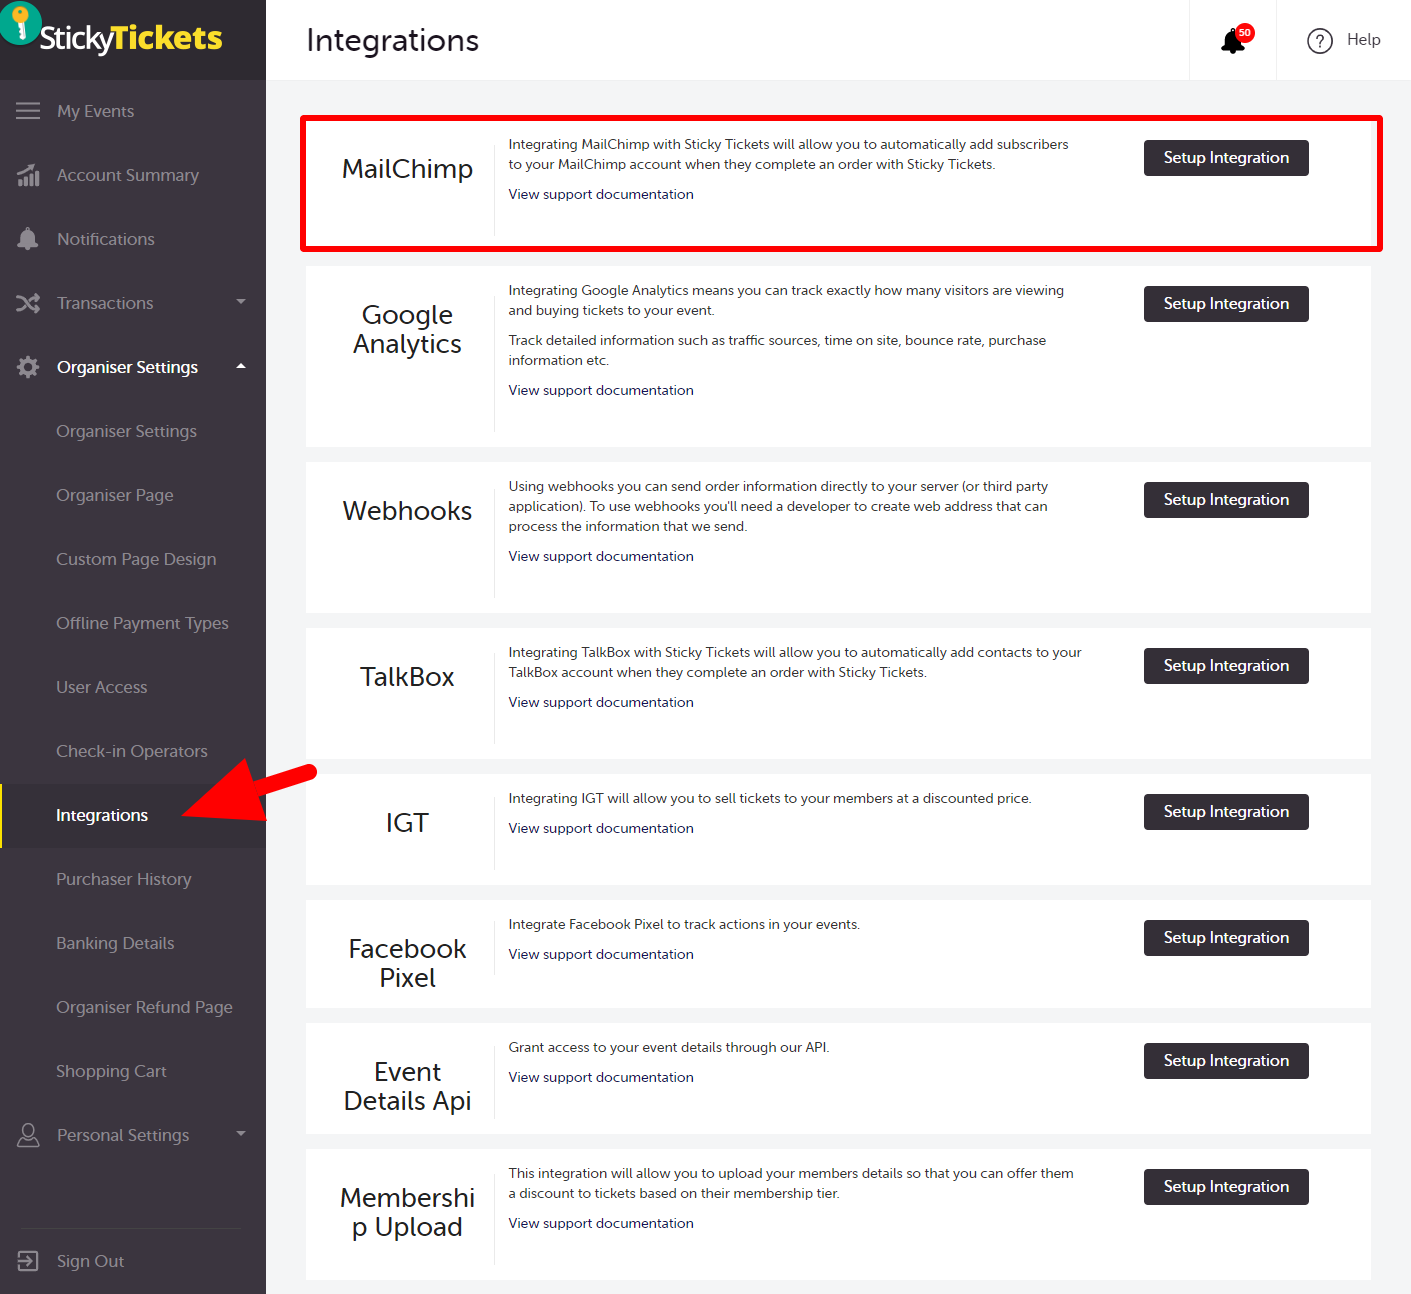
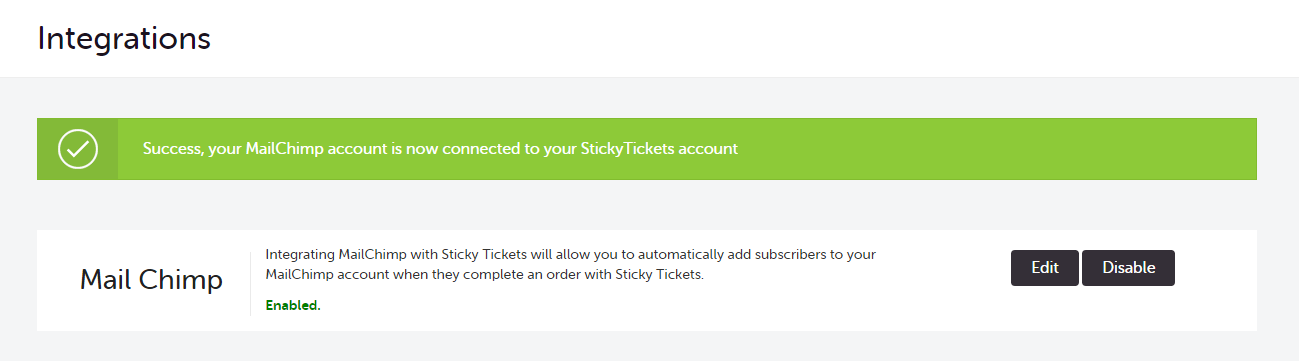
Log in to your Sticky Tickets account and navigate to the Organiser Settings tab, then click on the Integrations link.
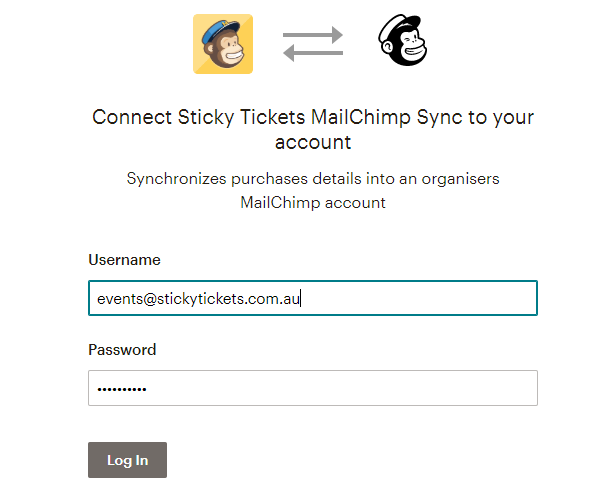
2. Click on Setup Integration. This will redirect you to the MailChimp login page, where you'll need to enter your MailChimp login details.
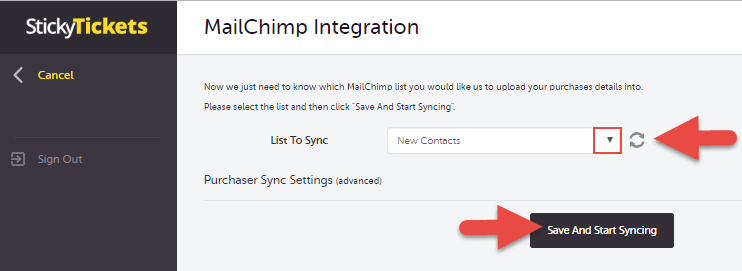
3. If you have an existing list within MailChimp that you want to synchronize your sales with, choose this list from the dropdown menu.
If you don't have a list set up in MailChimp, you must log in to your MailChimp account and create a list. Afterward, click on the refresh icon to display the newly created list in the dropdown menu. For detailed instructions on creating a list in MailChimp, refer to the MailChimp Account Options section towards the bottom of this solution.
Advanced Settings
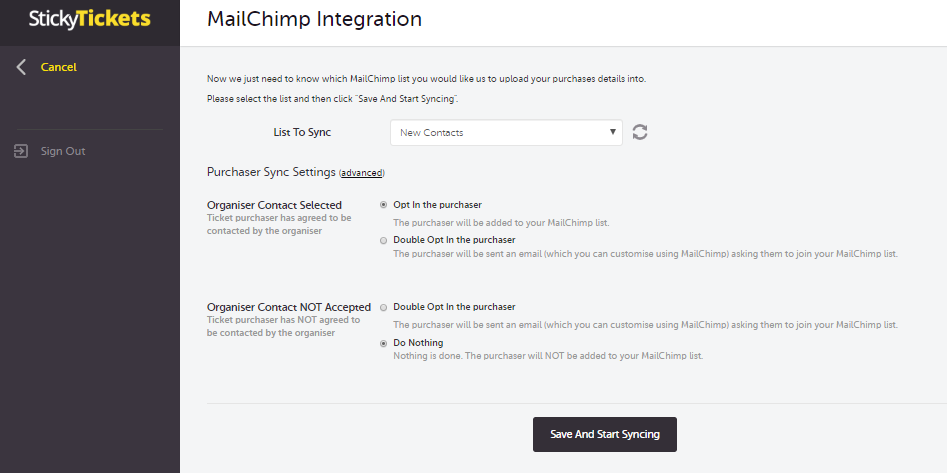
Access the Advanced Settings by clicking on the Advanced link to modify your sync preferences.
After choosing your MailChimp list to synchronize and adjusting any preferences, click on Save And Start Syncing to implement the changes.
MailChimp Account Options
A. Creating a MailChimp list
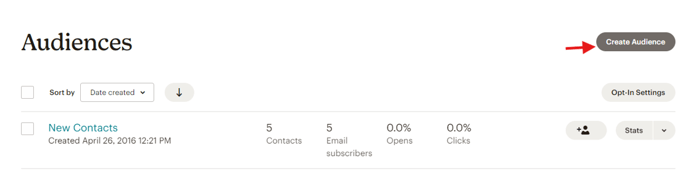
- Log in to your MailChimp account. In the left pane click Audience Dashboard.

3. Click the Create Audience
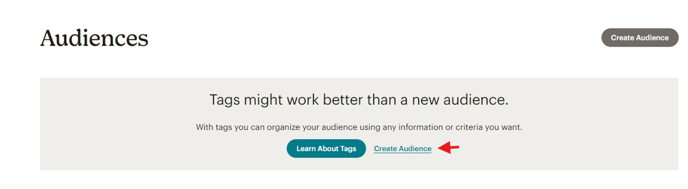
4. Click “Create Audience” from a suggestion box.
5. Enter the Audience name and details, then click on the Save button.


Once you have created your MailChimp list, you can return to your Sticky Tickets account. If you are still on the MailChimp Integration page, click on the Refresh icon to bring up your newly created list in the drop-down menu. Alternatively, follow the steps at the top of this page.
Customising your Opt-In email message
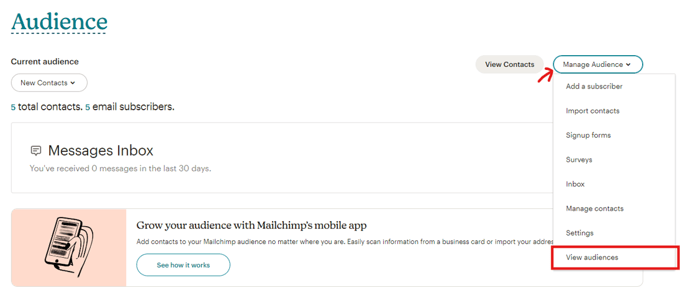
- Log in to your MailChimp account. In the left pane click Audience Dashboard.
- In the “Audience” section, click the “Manage Audience” dropdown button and select “View audiences”.
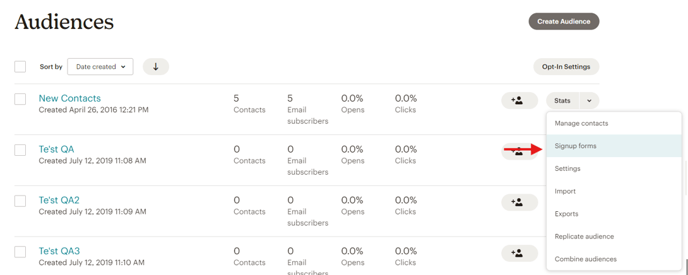
- Choose the list you want to edit the opt-in message for then click on Stats > Signup Forms.
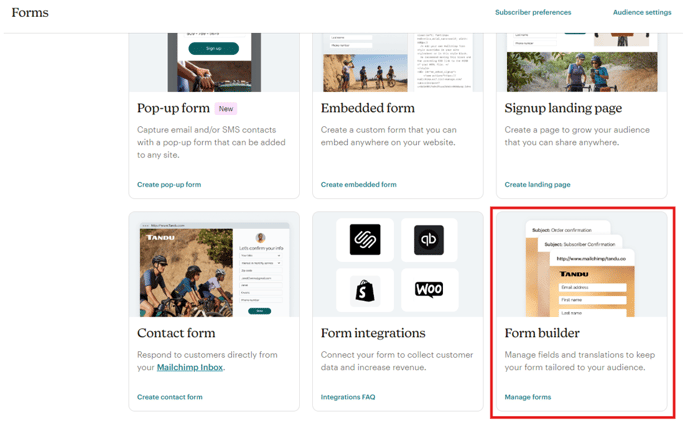
4. In the “Forms” section, scroll down and select “Form Builder” from the image lists
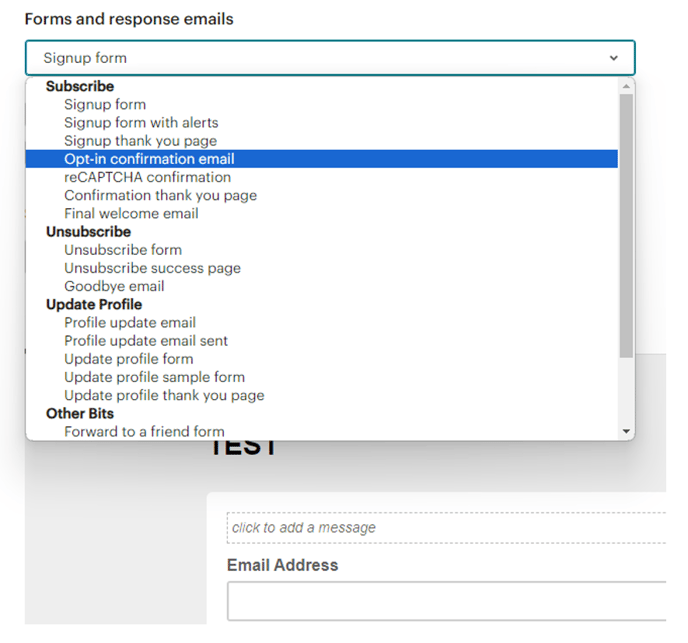
5. From the drop-down menu (Forms and response email), choose Opt-In Confirmation Email. Edit the email subject and content according to your preferences.

6. Click on Save & Close.
If you have any questions about MailChimp integration or anything else, please contact us at support, and we'd be more than happy to help.