You can edit your seating plan at any time after publishing. While editing, the plan will either remain visible to ticket purchasers (if you edit without unpublishing) or be temporarily hidden (if you unpublish first).
Need to unpublish first? If your changes involve removing or reassigning seats, unpublish the plan before editing so ticket purchasers don't see an incomplete layout. See: How to unpublish a seating plan.
How to access the seating plan editor
- Log in to your Sticky Tickets organiser account.
- Go to My Events and open the event with the seating plan you want to edit.
- Click the Edit Event tab.
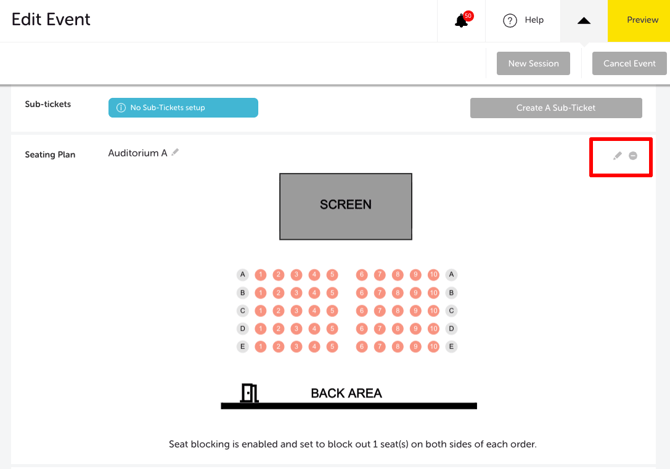
- Scroll down to the Seating Plan section and click the edit (pencil) icon.
The seating plan editor opens.
What you can edit
-
Rename the seating plan.
-
Enter a new name in the Seating Plan Name field on the right panel and click Change Name. You can rename a published plan without unpublishing it first.
-
-
Edit, copy, or delete objects
-
Click any object on the canvas (section, table, extra, or text) to select it. The right panel will show:
- Edit — opens the object's settings to update label, rows, seats, ticket types, colours, and other configuration
- Copy — duplicates the selected object
- Delete — removes the object permanently
If tickets have already been sold for specific seats: Do not delete or reassign those seats. Deleting a seat that has been sold will cause issues with existing orders. Contact our support team before making structural changes to a plan with existing sales.
Seat colour guide
When viewing the editor after tickets have been sold, seats will appear in different colours:
| COLOUR | MEANING |
|---|---|
| Salmon/orange | Available — not yet purchased |
| Black | Booked — purchased by a ticket purchaser |
| Red | Blocked — automatically blocked by the seat blocking feature |
Preview the current published plan
Click Preview Published Plan in the right panel to view how the seating plan currently looks to ticket purchasers — without leaving the editor.
-
Save and republish your changes
-
Click Save to save your changes. The seating plan editor confirms the save with a success banner.
-
Click Publish to update the published version with your changes. If the plan was unpublished before editing, this makes it visible to ticket purchasers again.
-
Don't forget to republish. If you save your changes but don't click Publish, ticket purchasers will continue to see the previous version of the plan.
Most common scenarios and questions
My changes aren't showing on the event page.
-
Click Publish after saving — saving alone does not update the published version on the event page.
I can't find the edit icon on the Seating Plan section.
-
Make sure you're on the Edit Event tab, not the Event Summary page. Scroll down to the Seating Plan section — the pencil icon is on the right side of the section header.
Can I edit a seating plan while it's still published?
-
Yes — you can make changes to the plan while it remains published. Ticket purchasers will see the updates after you click Publish. If you want to hide the plan during editing, unpublish it first.
Can I change the ticket type assigned to a seat after tickets have been sold?
-
This is not recommended for seats that have already been purchased. Contact our support team before making ticket type changes on a plan with existing sales.
Can I rename the seating plan without affecting ticket purchasers?
-
Yes — renaming the plan does not affect anything visible to ticket purchasers on the event page.
Need more help?
If you need help editing your seating plan, contact our support team.