The waitlist feature lets ticket purchasers register their interest once your event reaches capacity, so you can offer them tickets later if any become available.
NOTE: The waitlist feature isn't available with Donation-type tickets.
How to enable the waitlist
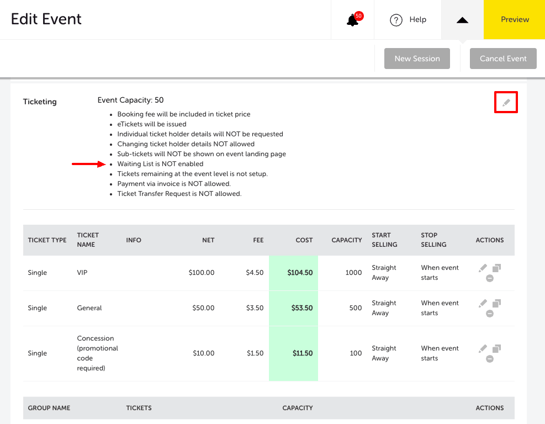
- Open your event and go to the Edit Event tab. Scroll to the Ticketing section.
- Select the edit (pencil) icon to open the Event Ticketing page.
- Tick Enable Waiting List — this creates a waiting list once your event capacity has been exhausted.
- Select Save Changes.
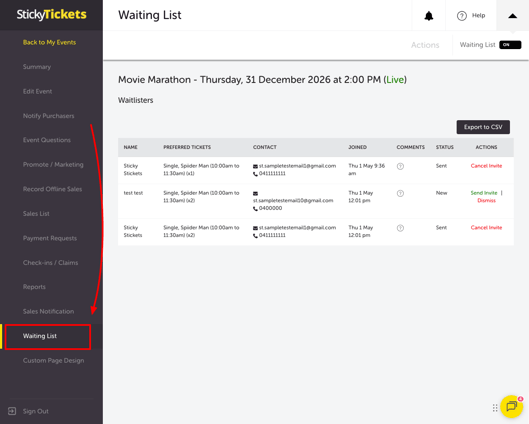
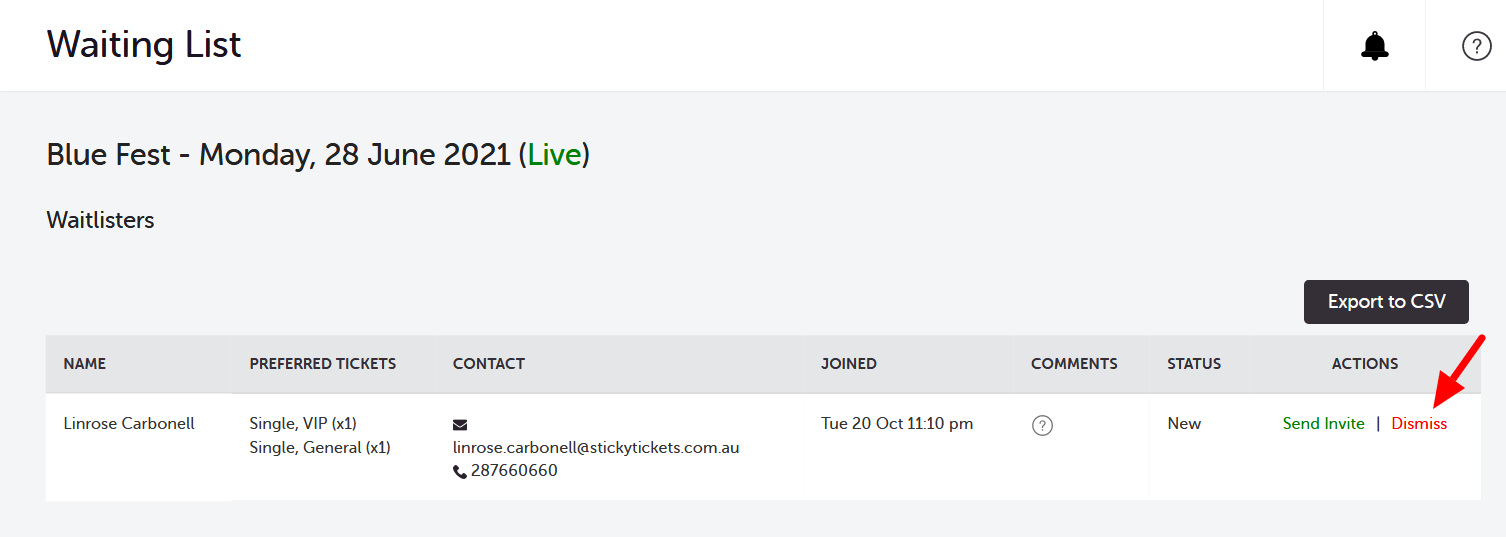
Once enabled, a Waiting List tab appears in your left navigation panel, listing everyone who joins.
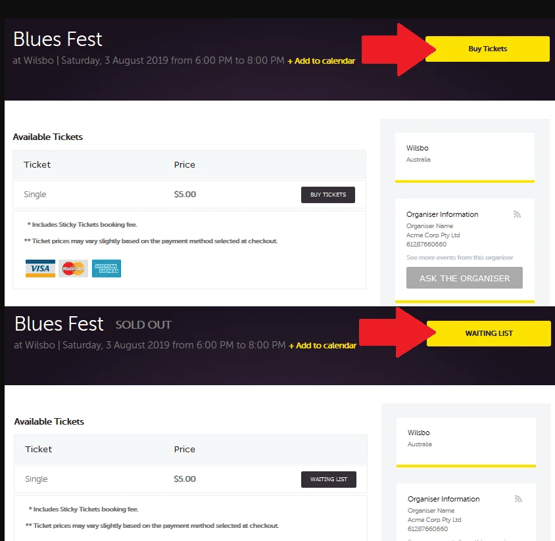
What ticket purchasers see
Once your event reaches capacity, the Buy Tickets button on your event page is replaced with a Waiting List button. Purchasers who select it can register their details and interest instead of purchasing directly.
Managing Waitlist Requests
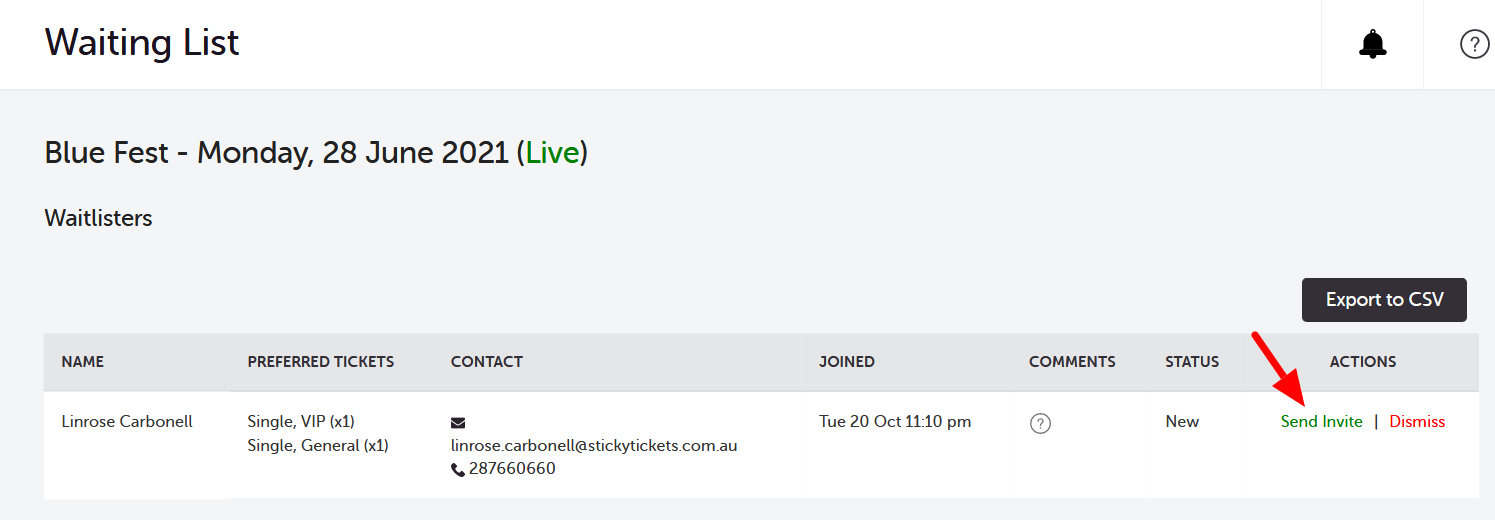
Each request in your Waiting List tab shows:
- The waitlister's name
- The ticket type(s) they're interested in
- Their email address and phone number
- The date they joined the waitlist
- Any message they've left for you
- The request status
- Available actions: Send Invite or Dismiss
To offer tickets to a waitlister
- Select Send Invite next to their request. This opens the Waiting List Invite page.
- Choose which ticket type(s) to offer — this can differ from what they originally requested — and how many.
- The page shows a summary of the waitlister's original request alongside your offer, plus a validity date. This date is set automatically and shows how long the waitlister has to complete their purchase before the invite expires — no action is needed from you here.
- Select Send Invitation.
The waitlister receives an email with two options: a link to purchase the tickets you've offered, or a link to decline the offer. If they accept and complete their purchase, your event capacity increases to reflect the tickets sold.
To decline a waitlist request
- Select Dismiss next to their request.
- Confirm by selecting Dismiss Wait Lister on the next page.
The waitlister is not notified when you dismiss their request.
Most common scenario and questions
Can I use the waitlist feature with Donation-type tickets?
-
No — the waitlist feature isn't supported for Donation-type tickets.
Does a waitlist invite expire?
-
Yes — each invite has a validity date, shown on the Waiting List Invite page when you send it. If the waitlister doesn't complete their purchase before then, the invite expires.
Can I re-invite someone I've dismissed?
-
If they're still on your waitlist, you can send them another invite at any time.
Is the waitlister notified if I dismiss their request?
-
No — dismissing a request doesn't send any notification to the waitlister.
Can I enable the waitlist after my event has already gone live?
-
Yes — you can enable it at any point from the Event Ticketing page, as long as your event doesn't use Donation-type tickets.
Need more help?
If you have any questions about the waitlist feature, contact our support team.