Events without a thumbnail image show a plain placeholder icon in search results, while events with one stand out with an actual image. Adding a thumbnail makes your event easier to notice and more recognisable.
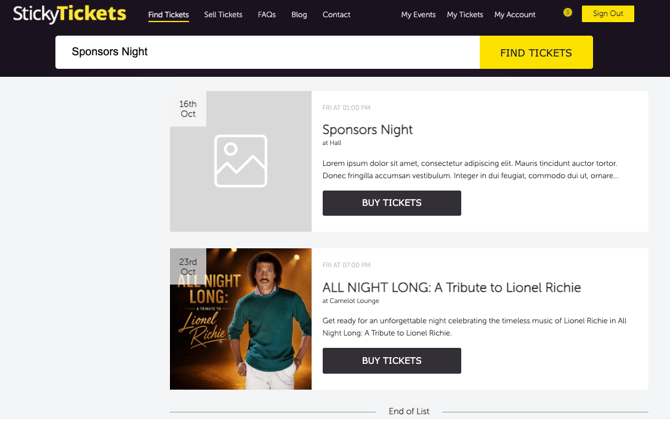
NOTE: This is different from images added inside your event description text. The Image Gallery (covered here) controls your event's thumbnail. Images inserted into the description text itself are separate — see our guide on adding images and video to your event description for that feature.
Option 1: Using the Image Gallery
- Log in to your account and open the event you're working on.
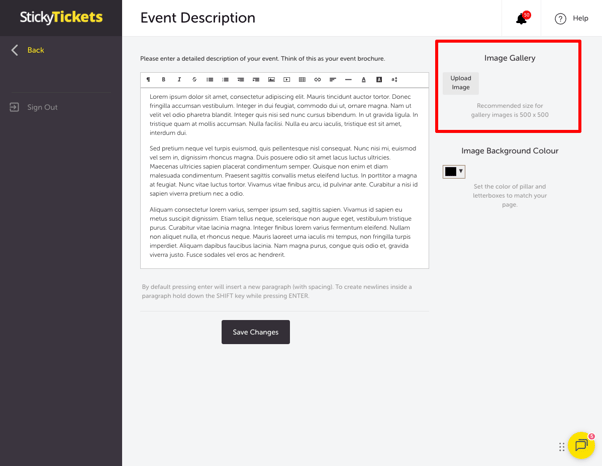
- Go to the Event Description section.
- In the Image Gallery (holds up to 3 images), select Upload Image.
- Upload your image. The first image you upload automatically becomes your event's thumbnail.
Recommended size: 500 x 500 pixels.
You can also set an Image Background Colour in this section — this sets the colour of the pillar and letterbox bars around your thumbnail to match your event page.
Option 2: Using the Promote/Marketing tab
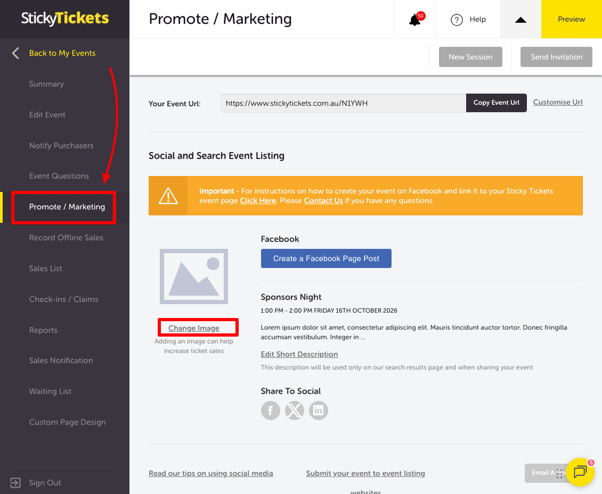
- In your event settings, go to the Promote/Marketing tab.
- Select Change Image.
- Select Browse to choose a different image from your device.
- Select Select to confirm. Your new thumbnail is applied immediately.
Most common scenario and questions
What's the difference between the Image Gallery and images in my event description?
-
The Image Gallery controls your event's thumbnail — the image shown in search results. Images inserted directly into your event description text are separate and don't affect your thumbnail.
What happens if I don't upload any image?
-
Your event will show a plain placeholder icon in search results instead of an image.
Can I change my thumbnail after my event goes live?
-
Yes — you can update it at any time using either method above.
Need more help?
If you have any questions about adding images, contact our support team.